Everything you need to know about RapidAPI Studio
RapidAPI offers six products to its users. Each product is designed to cater to a particular need around APIs. For instance, the RapidAPI Hub allows you to find an API quickly, whereas RapidAPI Testing lets you write comprehensive tests for your APIs.
Now RapidAPI is bringing another product to its users called RapidAPI Studio. In this piece, we will look at everything you should know to get started. So without any further ado, let’s jump in!
- What is RapidAPI Studio?
- Why RapidAPI Studio Exists?
- What Does RapidAPI Studio Offer?
- Create an API Using RapidAPI Studio
- Debug Your API Using RapidAPI Studio
- Schedule API Tests Using RapidAPI Studio
- Wrap Up
What is RapidAPI Studio?
RapidAPI Studio houses different RapidAPI products into a single platform to provide an integrated user experience to build, consume, and govern APIs. It has the power of RapidAPI Provider to help you publish your APIs on RapidAPI Hub. It utilizes the strengths of Paw to create different branches, sessions, and environments to quickly debug your APIs.
In simpler words, RapidAPI Studio is the only place where you need to be during your API development lifecycle.
We built this DevTool tool because we wanted our users to do things quickly and not switch between products to perform tasks like writing a test, creating a new version, debugging APIs, etc.
Why RapidAPI Studio Exists?
Developers around the world are facing challenges when it comes to API development. There are fractured development tools, workflows, and coding environments that exist due to a lack of integration across the developer lifecycle. All of this makes collaboration difficult and makes the developer or team unproductive.
This problem becomes worse by the lack of a centralized repository for APIs and API tools. Due to this, the developers shift among different tools to perform different tasks.
This is where RapidAPI Studio comes into the picture. It is the centralized tool we have created for API developers to help them every step of the way.
What Does RapidAPI Studio Offer?
You can do a lot with RapidAPI Studio. It is packed with exciting features that can help make your API more performant. Let’s look at some of the things that RapidAPI Studio offers to developers.
Streamlined Collaboration
RapidAPI Studio facilitates collaboration in API development by providing role-based access control, organization hierarchy, team management, audit trails, API versioning, and more. You can also create workflows and integrate IDP using Security Assertion Markup Language (SAML).
Simplified and Integrated Workflow
As previously mentioned, RapidAPI Studio integrates several RapidAPI products to provide a simplified and integrated workflow. You can import/export APIs with OpenAPI specs, set up environment variables, generate code snippets, write extensive tests using visual and code editor, publish API on RapidAPI Hub, etc.
Access Anywhere
You can use the features of RapidAPI anywhere, whether it is inside the browser, VS Code, Native Apps, or CLI. With RapidAPI VS Code extension, there is a bi-directional sync between RapidAPI Studio and VS Code. It means your Studio projects can be available inside VS Code and vice versa, so you can test them anywhere.
Create New APIs Using RapidAPI Studio
RapidAPI Studio lets you create and publish a new API on RapidAPI Hub. It enables spec-driven development, which means you can either create an API from scratch or import its OpenAPI spec.

Extensive API Testing
Testing APIs is important, especially when you want to monetize them. If your API fails, you can lose users. Fortunately, you can quickly write API tests inside RapidAPI Studio with something called Tests. The Tests in RapidAPI Studio create and manage comprehensive API tests from development through deployment.
When you open or create an API on RapidAPI Studio, you see a Tests option on the left sidebar. Here, you can code an API test, use the visual editor, or use automatic test generation to create an API test. You can also select the location where your test should be executed.
Using RapidAPI Studio, you can also schedule your API tests to execute automatically after a certain time period. Each test, when executed, generates a detailed report that you can look at later. You can also set up custom alerts when the tests for your API fail.
Built-in HTTP Client
RapidAPI Studio has an HTTP Client inside it that you can use to test or debug the APIs you build. It accelerates the API development process with the ability to run and organize advanced API requests quickly.

Let’s quickly look at it in a more practical scenario.
Assume that you have developed an API and are publishing it on RapidAPI Hub using RapidAPI Studio. When you are done, you want to quickly test and see if every endpoint is working as expected. How can you do it?
It’s simple. Select Requests from the sidebar and create a new API request in the HTTP client. Add the API endpoint, select the HTTP method, add headers, query parameters, or body, and press Send. The built-in HTTP client will make the request, and you will see its result on the right side.
API Monetization
You can monetize all the APIs you add on RapidAPI Hub from the RapidAPI Studio. It provides you with two options, i.e., public and private plans.

As you can see, the public plans further contain basic, pro, ultra, and mega plans. You can customize each of them according to your liking. You can set up rate limiting, limit access to an endpoint, and more.
If the user does not find a plan according to their needs, you can create one for them using the private plans. The private plans let you utilize all the accessibility of the public plans. The only difference is you need to invite people to it.
API Analytics To Monitor Usage
Inside RapidAPI Studio, you can find analytics for each of your APIs. It centrally views, manages, analyzes, and monitors API usage across teams and organizations.
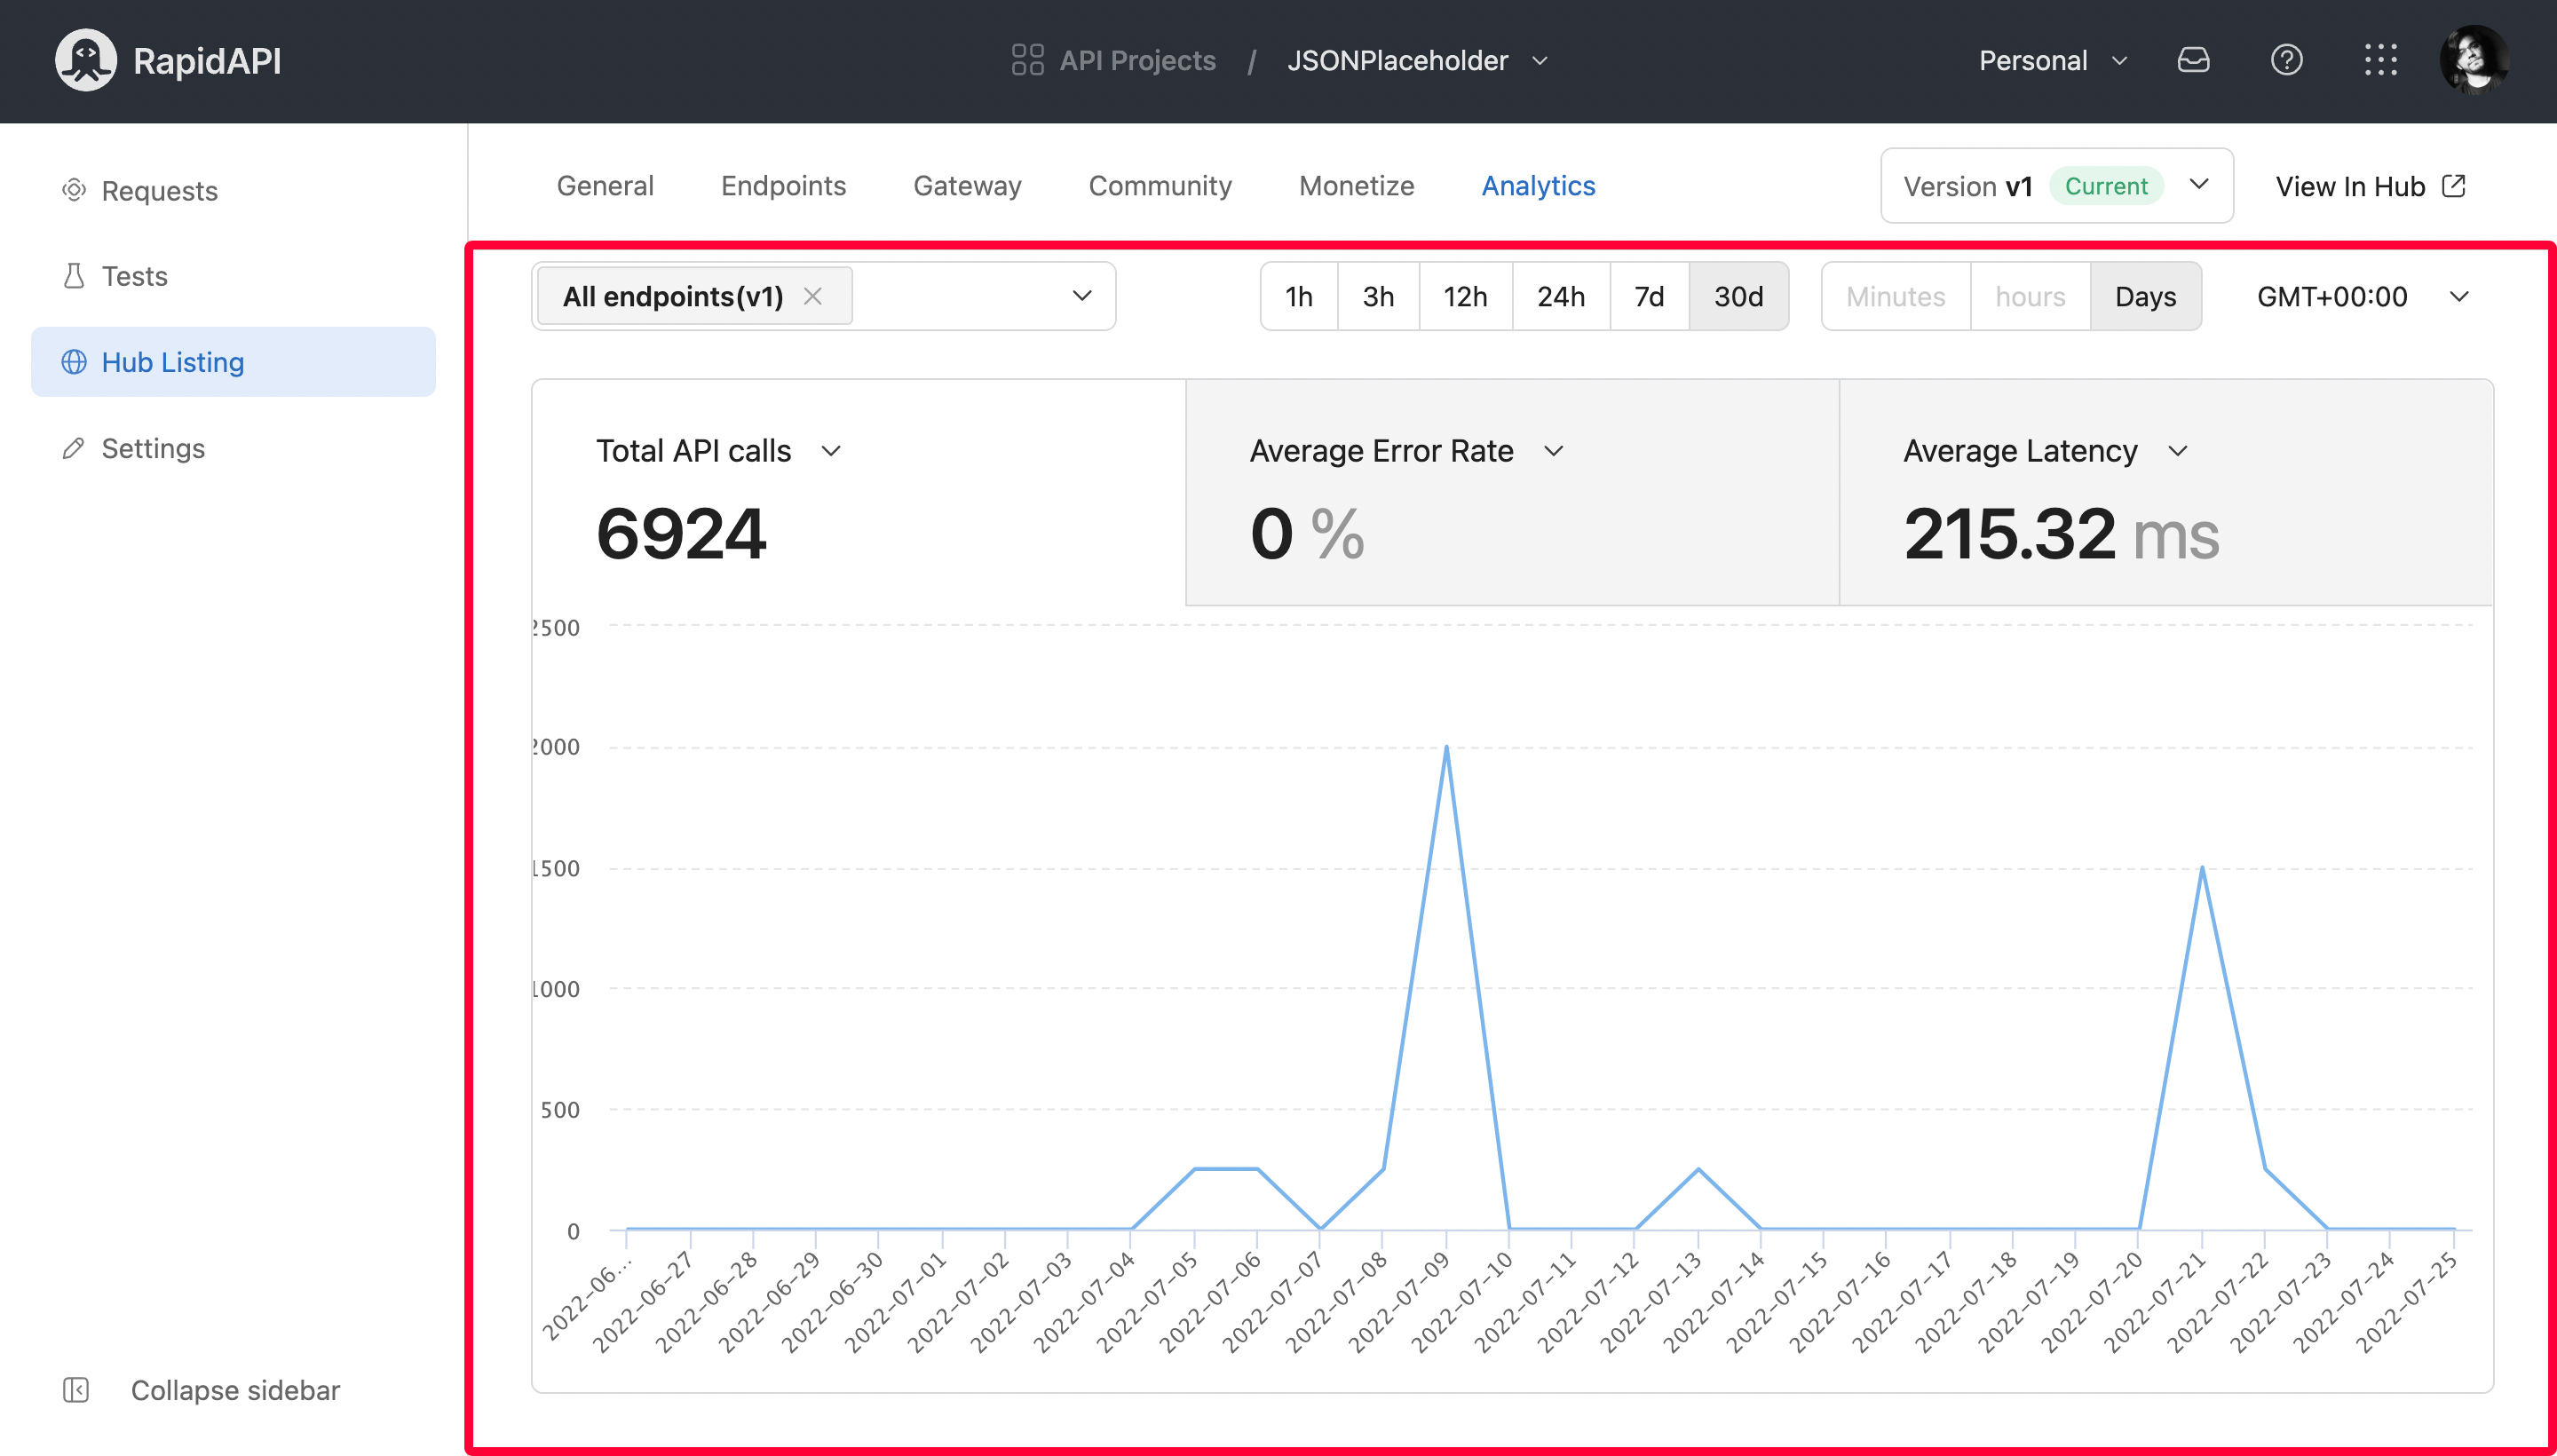
These analytics further consists of five sections.
- Traffic Analytics: Shows the total API calls, average error rate, and average latency. You can also look at median, max, and min error rates and latencies.
- User Analytics: Here, you can find active and total users of your API in the form of a graph.
- Revenue Analytics: You can see how much money your API made over the past 3, 6, or 12 months.
- Logs: Every API request your user makes gets logged here. You can expand each log to look at log details like the request header, request body, response header, etc. This helps you track down the issue with your API if it fails for some reason.
- Alerts: You can set up custom alerts for your API to alert you if something happens. For instance, you can create an alert that immediately lets you know when the total response size exceeds 500 KBs.
Secure Your API
RapidAPI Studio is full of features that help you secure your APIs. Its prevention against SQL and JavaScript injection attacks feature can automatically compare the paths, parameters, header, and body of all requests against predefined RegEx patterns. It then blocks the matching requests from reaching the server.
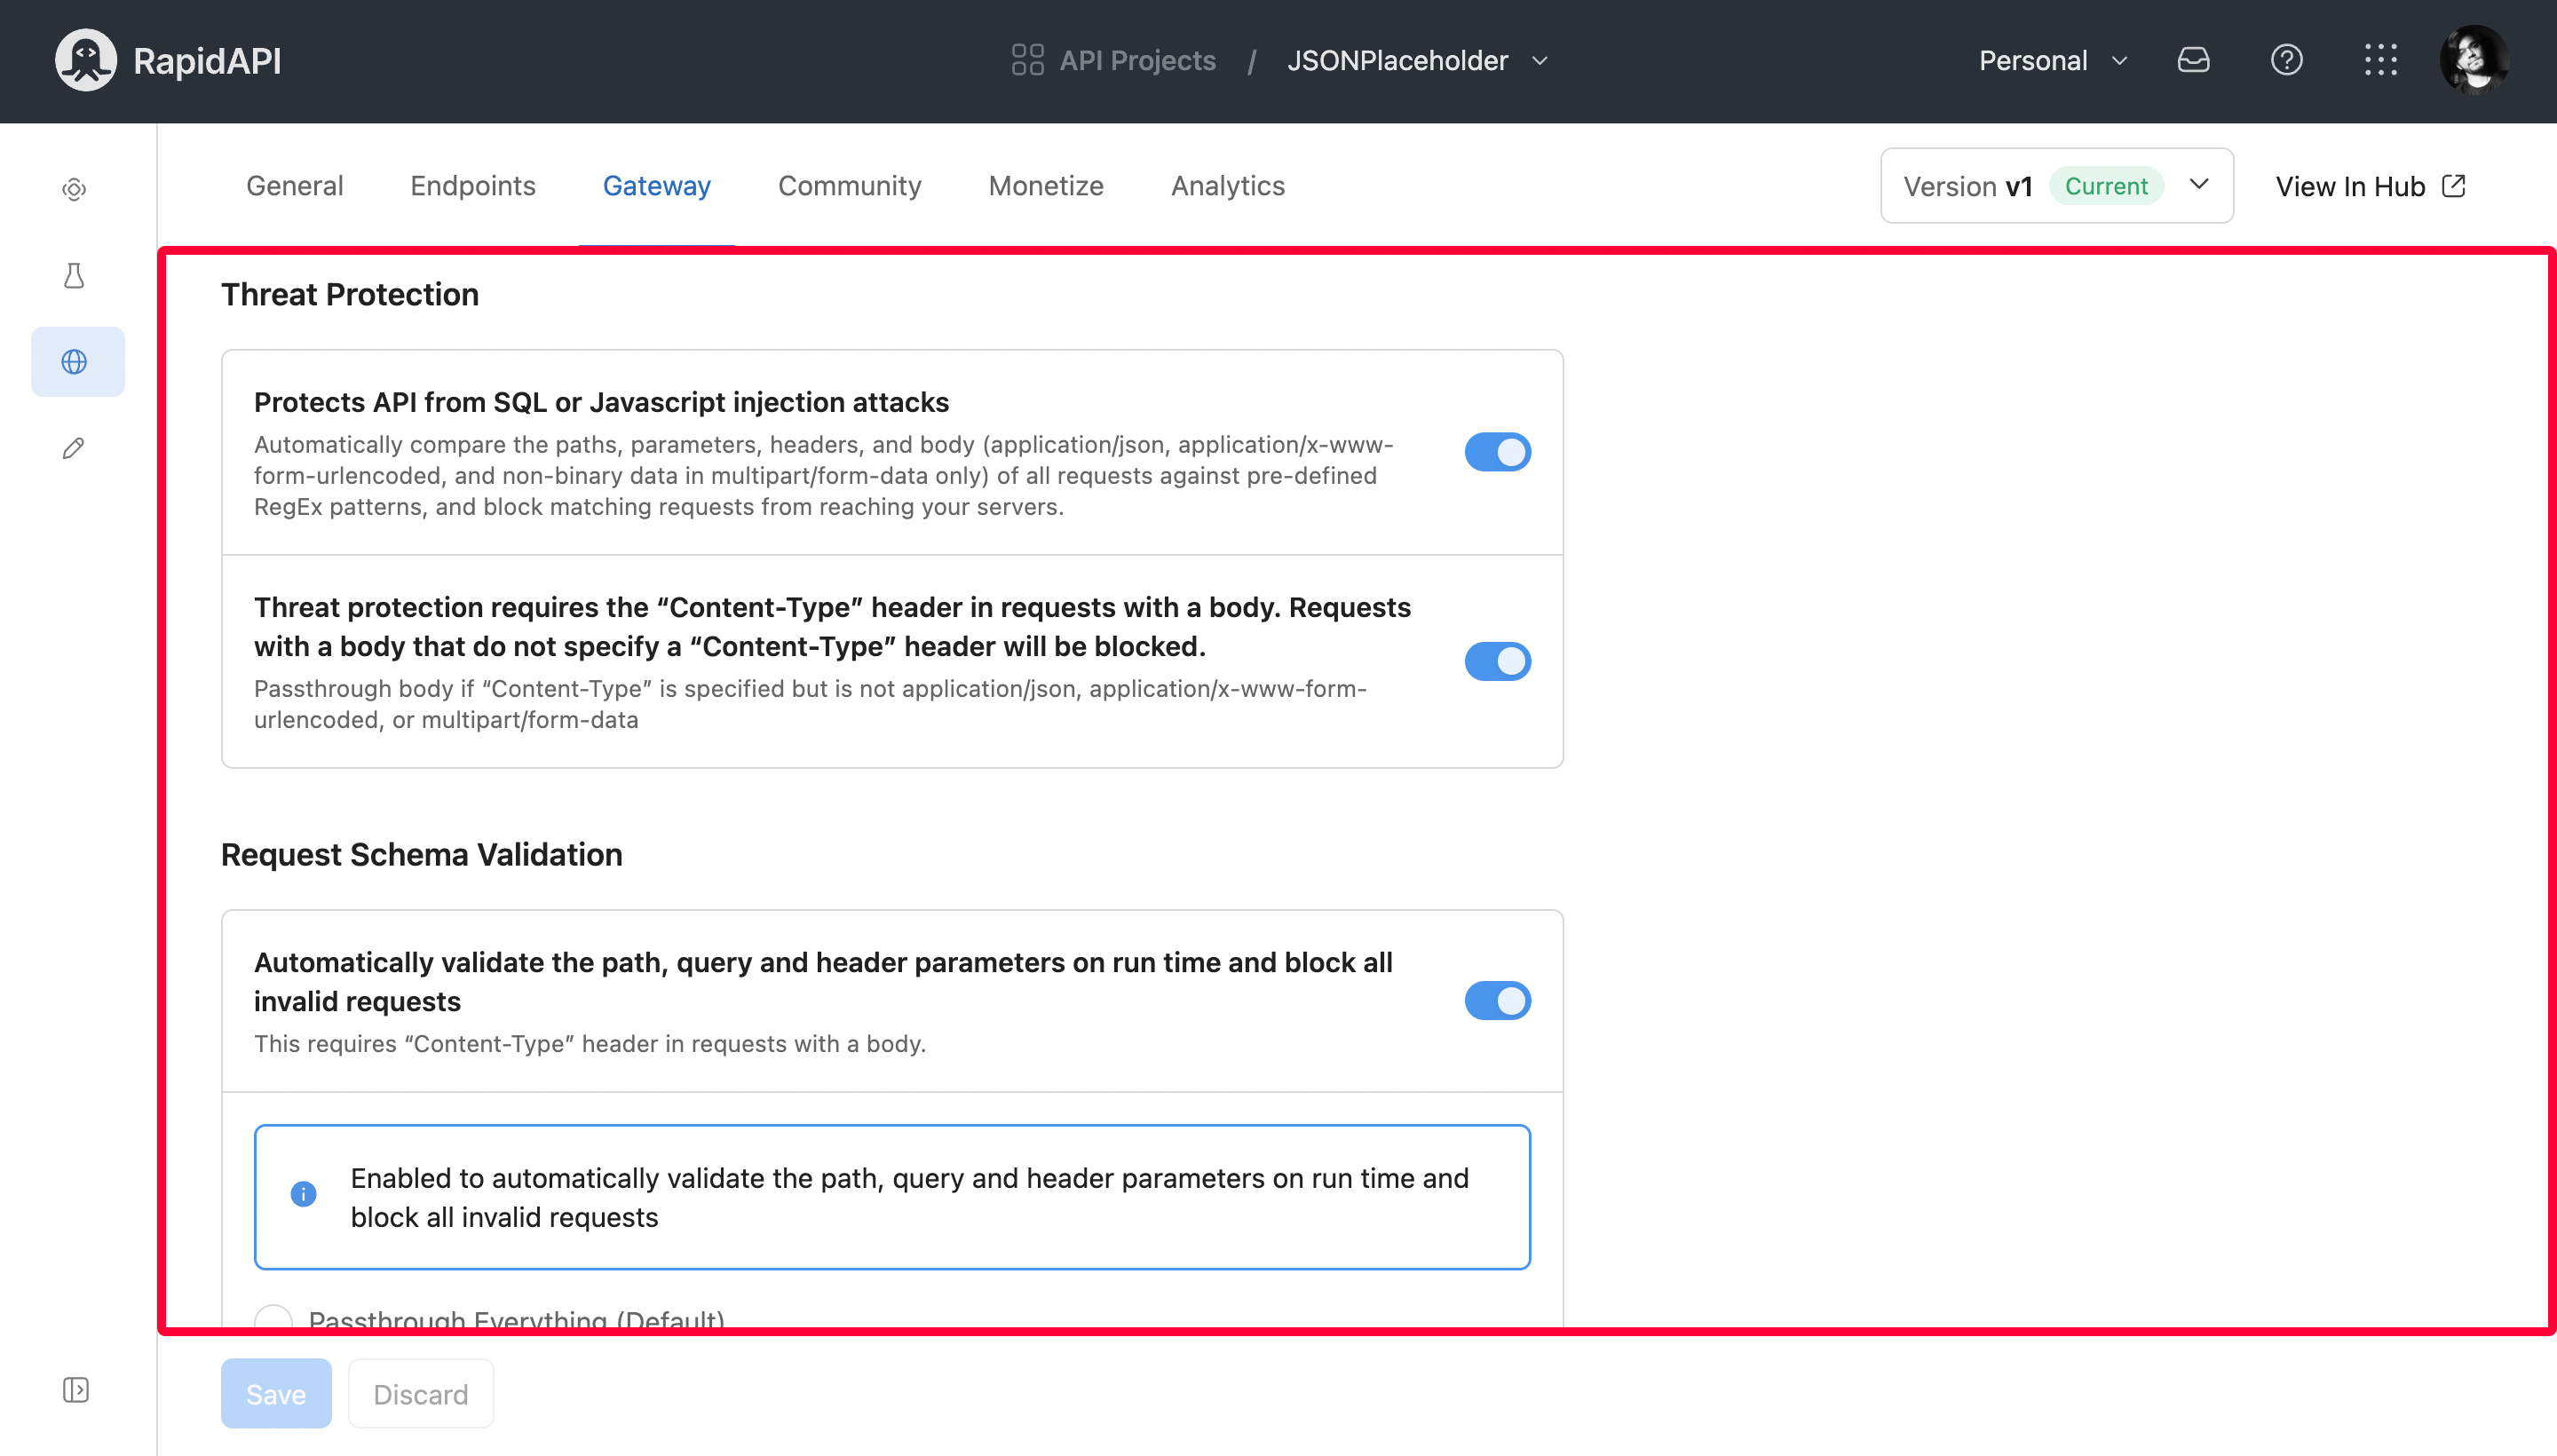
You can also set up request schema validation if you haven’t implemented it in your API. The request schema validation provides three options.
- Passthrough Everything (default)
- Strip and Passthrough
- Block
The first is the default behavior, where if the request contains a header or query parameter not defined in the API specification, the request will not be blocked.
The second will pass the request but strip the headers or query parameters not defined in the API specification.
The last one will block the request if it contains anything not defined in the API specification.
Other API security features also exist that RapidAPI Studio offers.
API Versioning To Provide Backward Compatibility
You can create multiple versions of an API inside RapidAPI Studio. For every new version, you can also define a different base URL, endpoints, transformations, and more. You can also build on top of an existing version.
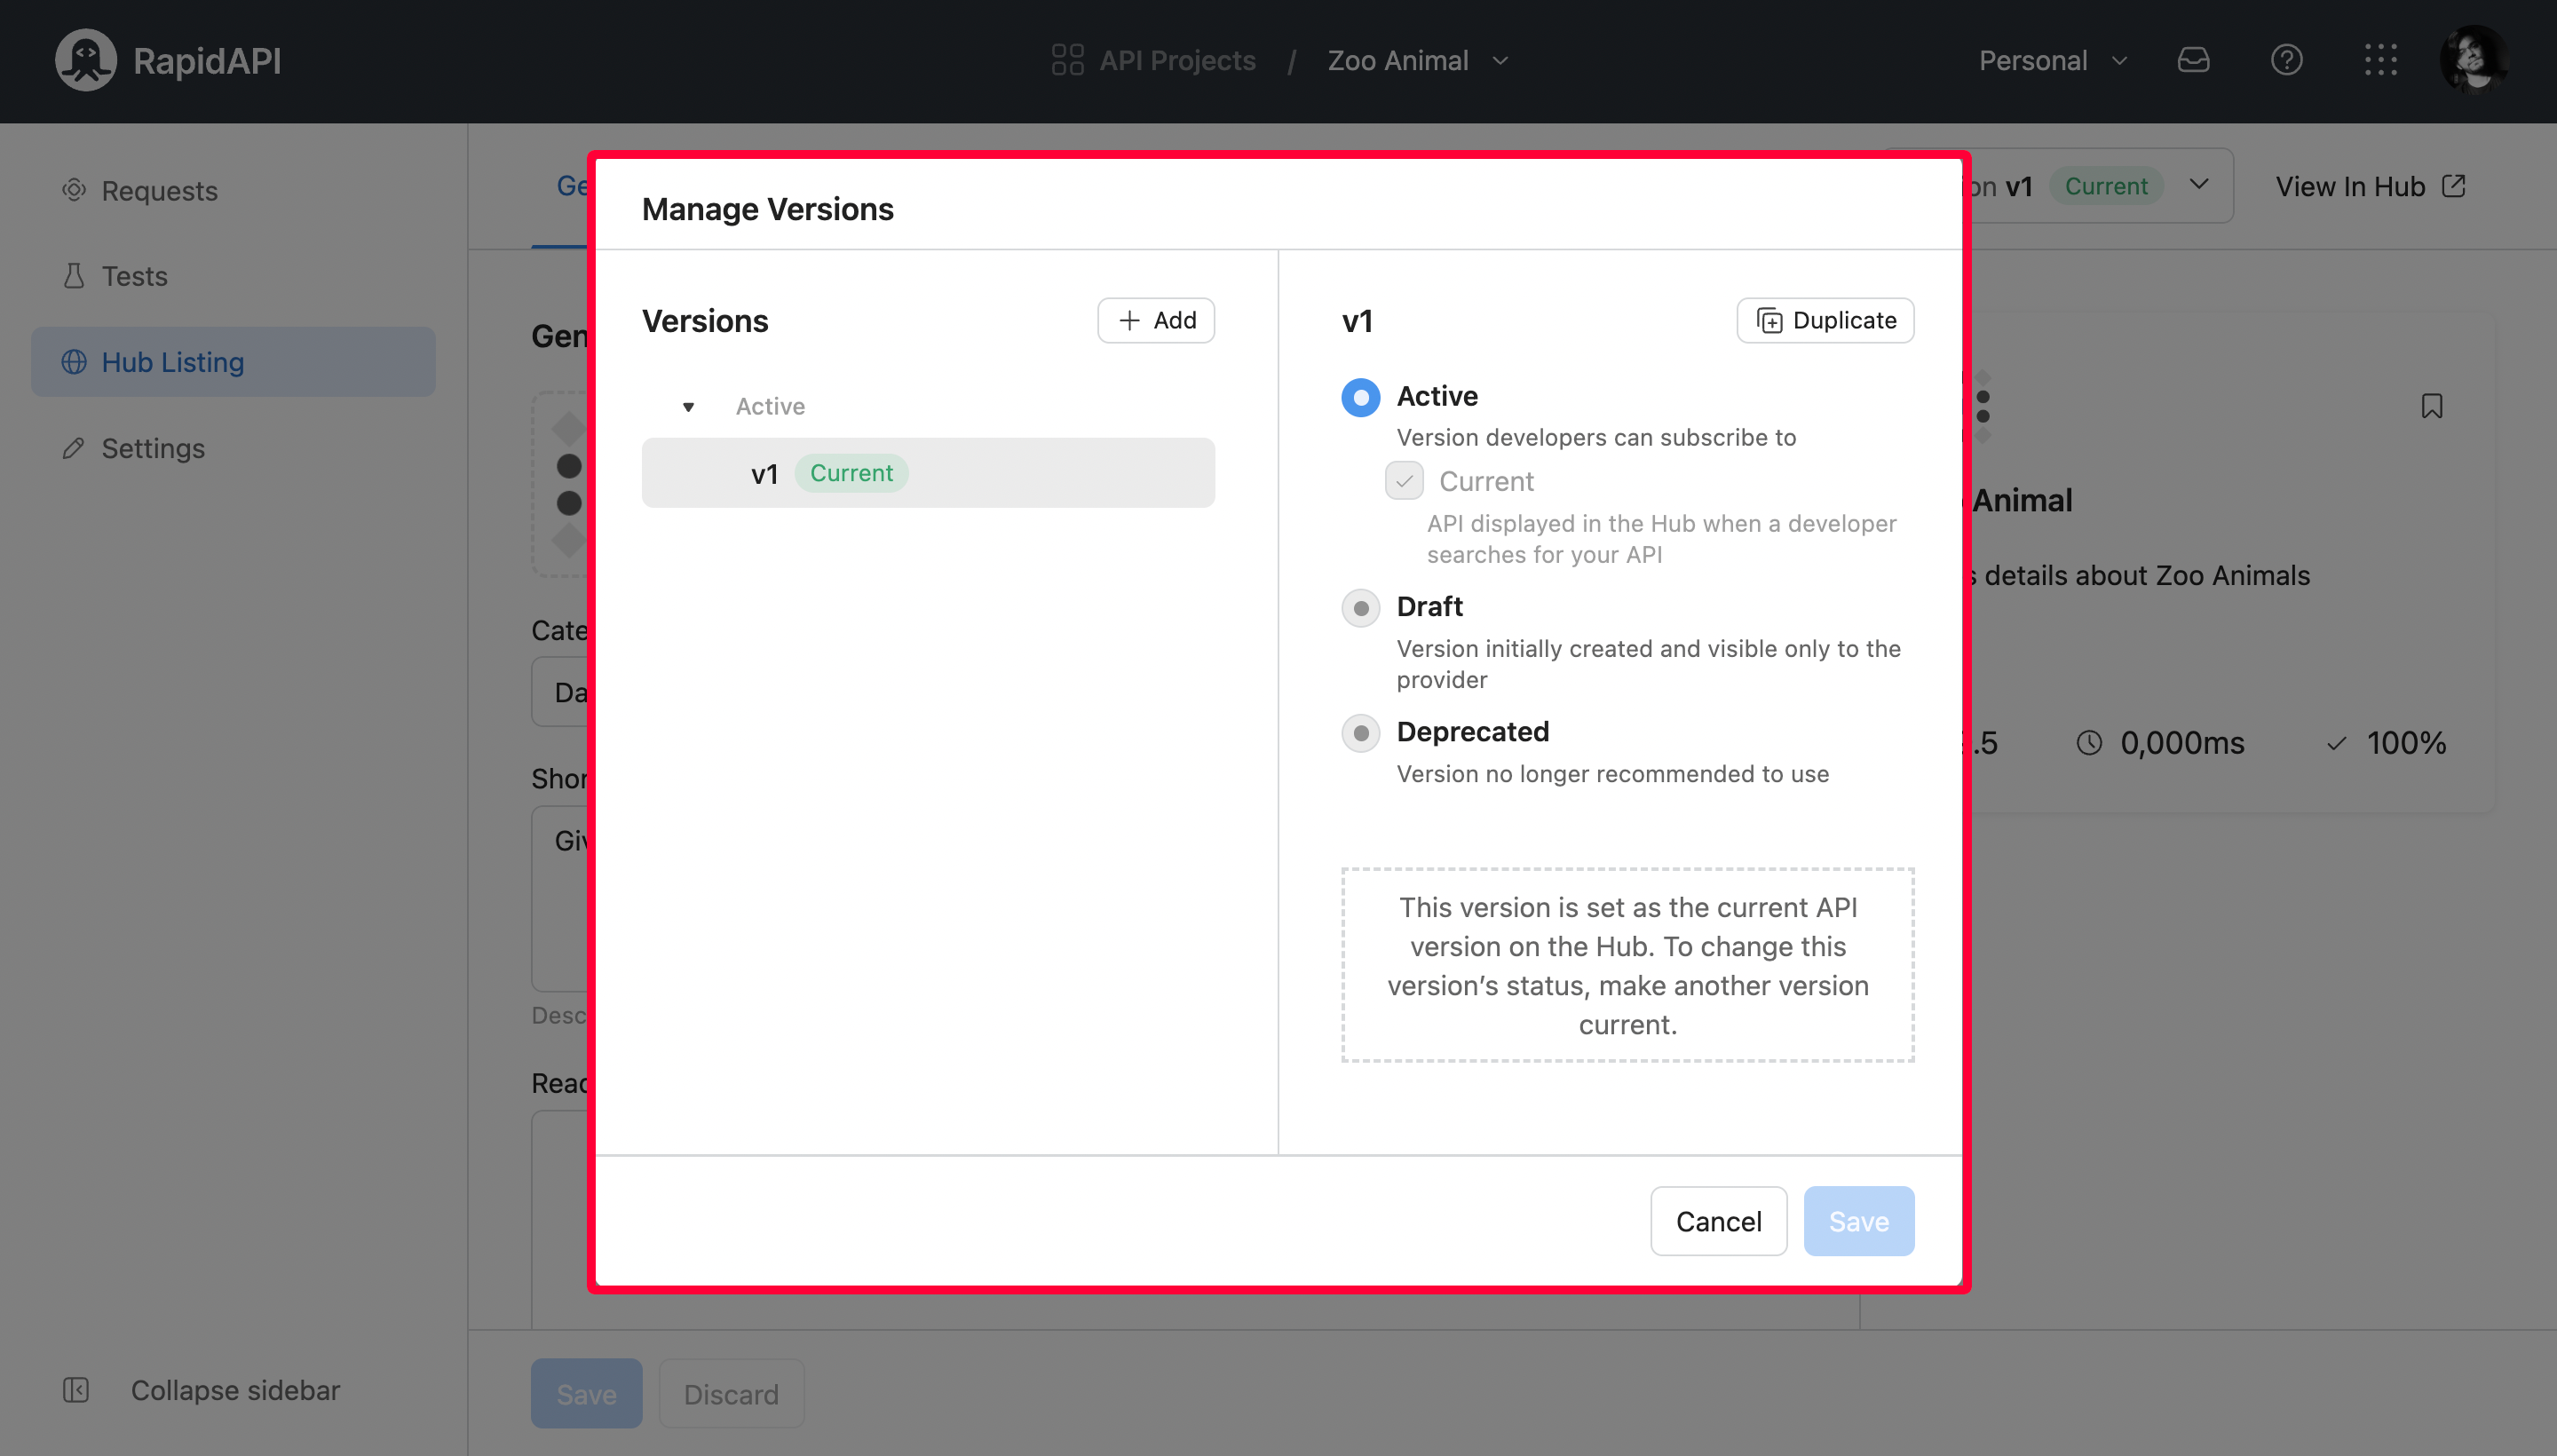
API versioning is vital because it provides backward compatibility for your API, and your users do not have to move to the newer version immediately. They can do it at their own pace.
These are some of the many incredible features of RapidAPI Studio. It has addressed several challenges developers face during API development lifecycle and provided a compact solution for them.
Create an API Using RapidAPI Studio
Let’s go ahead and look at how we can use RapidAPI Studio to create an API that we can share with other people privately. For the sake of this piece, I will use the Zoo Animal API I have found on the internet.
→ STEP #1
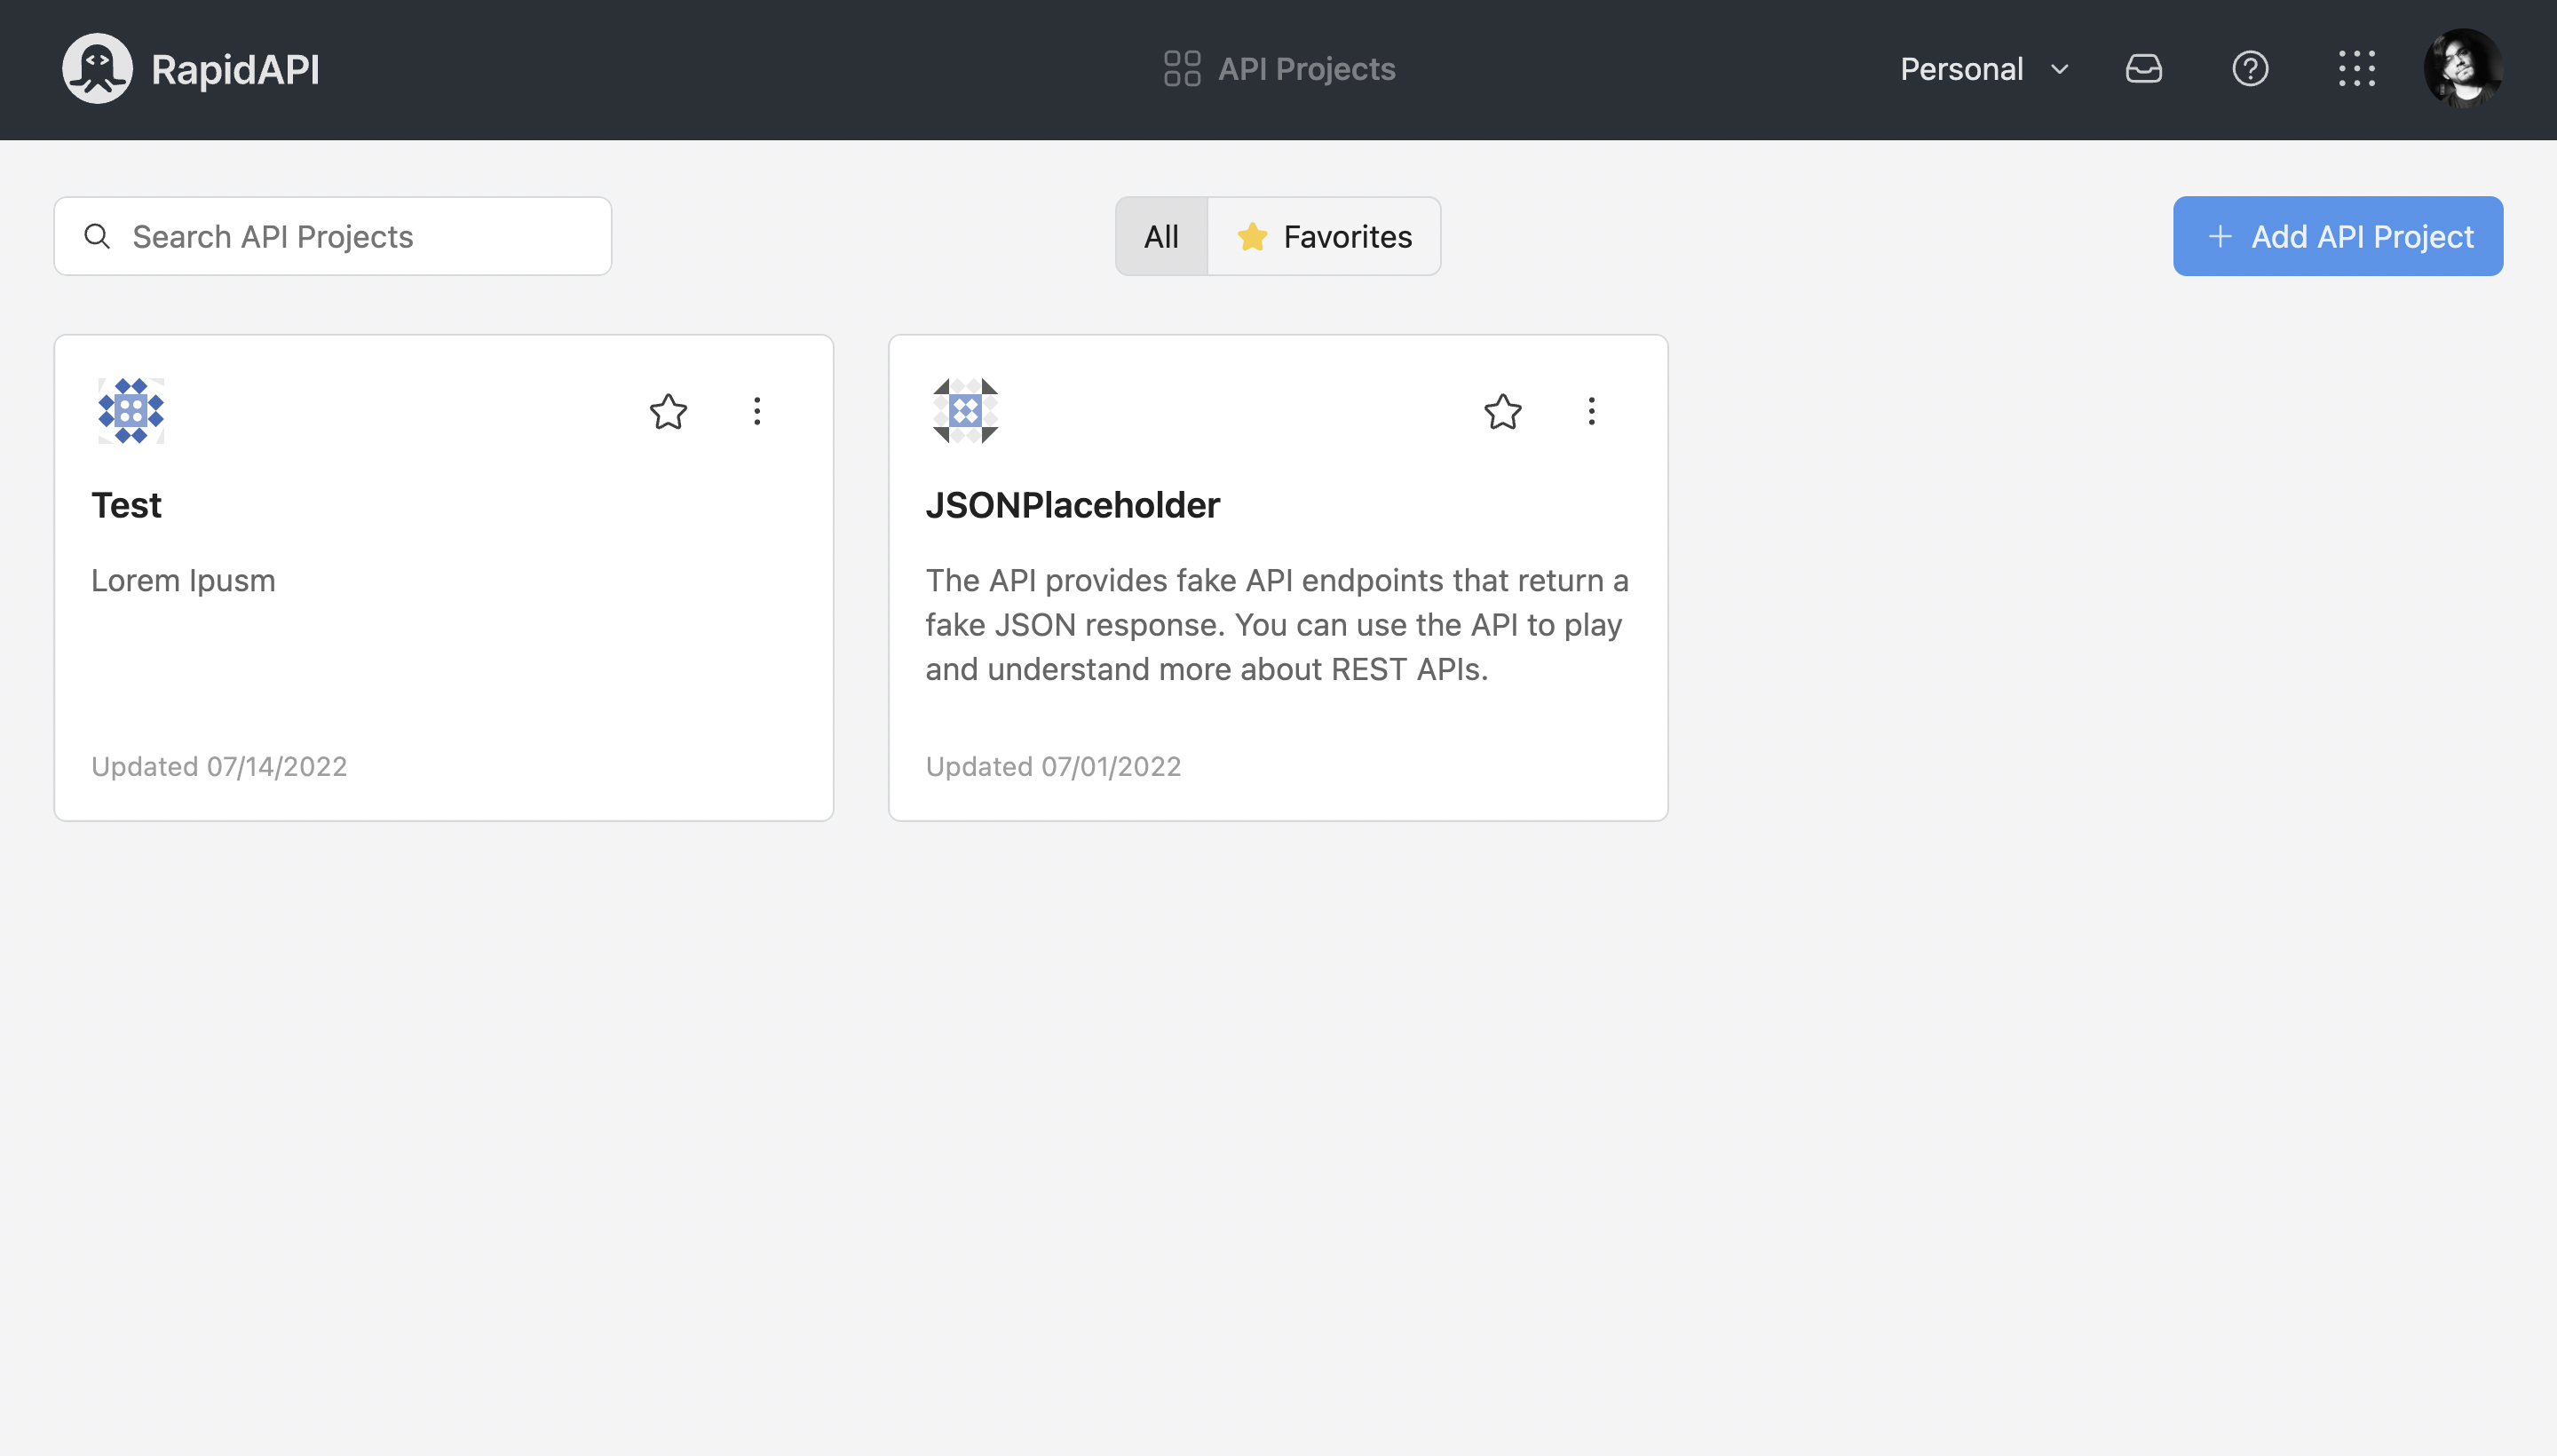
Click the Add API Project button on the RapidAPI Studio dashboard. Now give the API a name, add some description, and select the API category. I will keep the team Personal and the default “Do not import” option under “Import data from”.
Once you are done, click on Add API Project.

→ STEP #2
Now click on Hub Listing from the left sidebar. It will change the page, and now you will see different tabs like General, Endpoints, Gateway, Community, Monetize, and Analytics. By default, the General tab will be opened.
You can add details in the general tab like creating a readme for your API, updating its logo, etc. Scroll down to the bottom. You will see an option to add the base URL of the API. Since I am adding a Zoo Animal API, I will add the following URL.

→ STEP #3
Let’s create an endpoint. For this, click on the Endpoints tab at the top. It will change the page where now you can see we have options to create REST and GraphQL endpoints. Since the API I am using is a REST API, I will click on Create REST Endpoint.
Now we can see more options to name our endpoint, give it some description, select its HTTP method, write the endpoint path, and provide a bunch of other information about it.
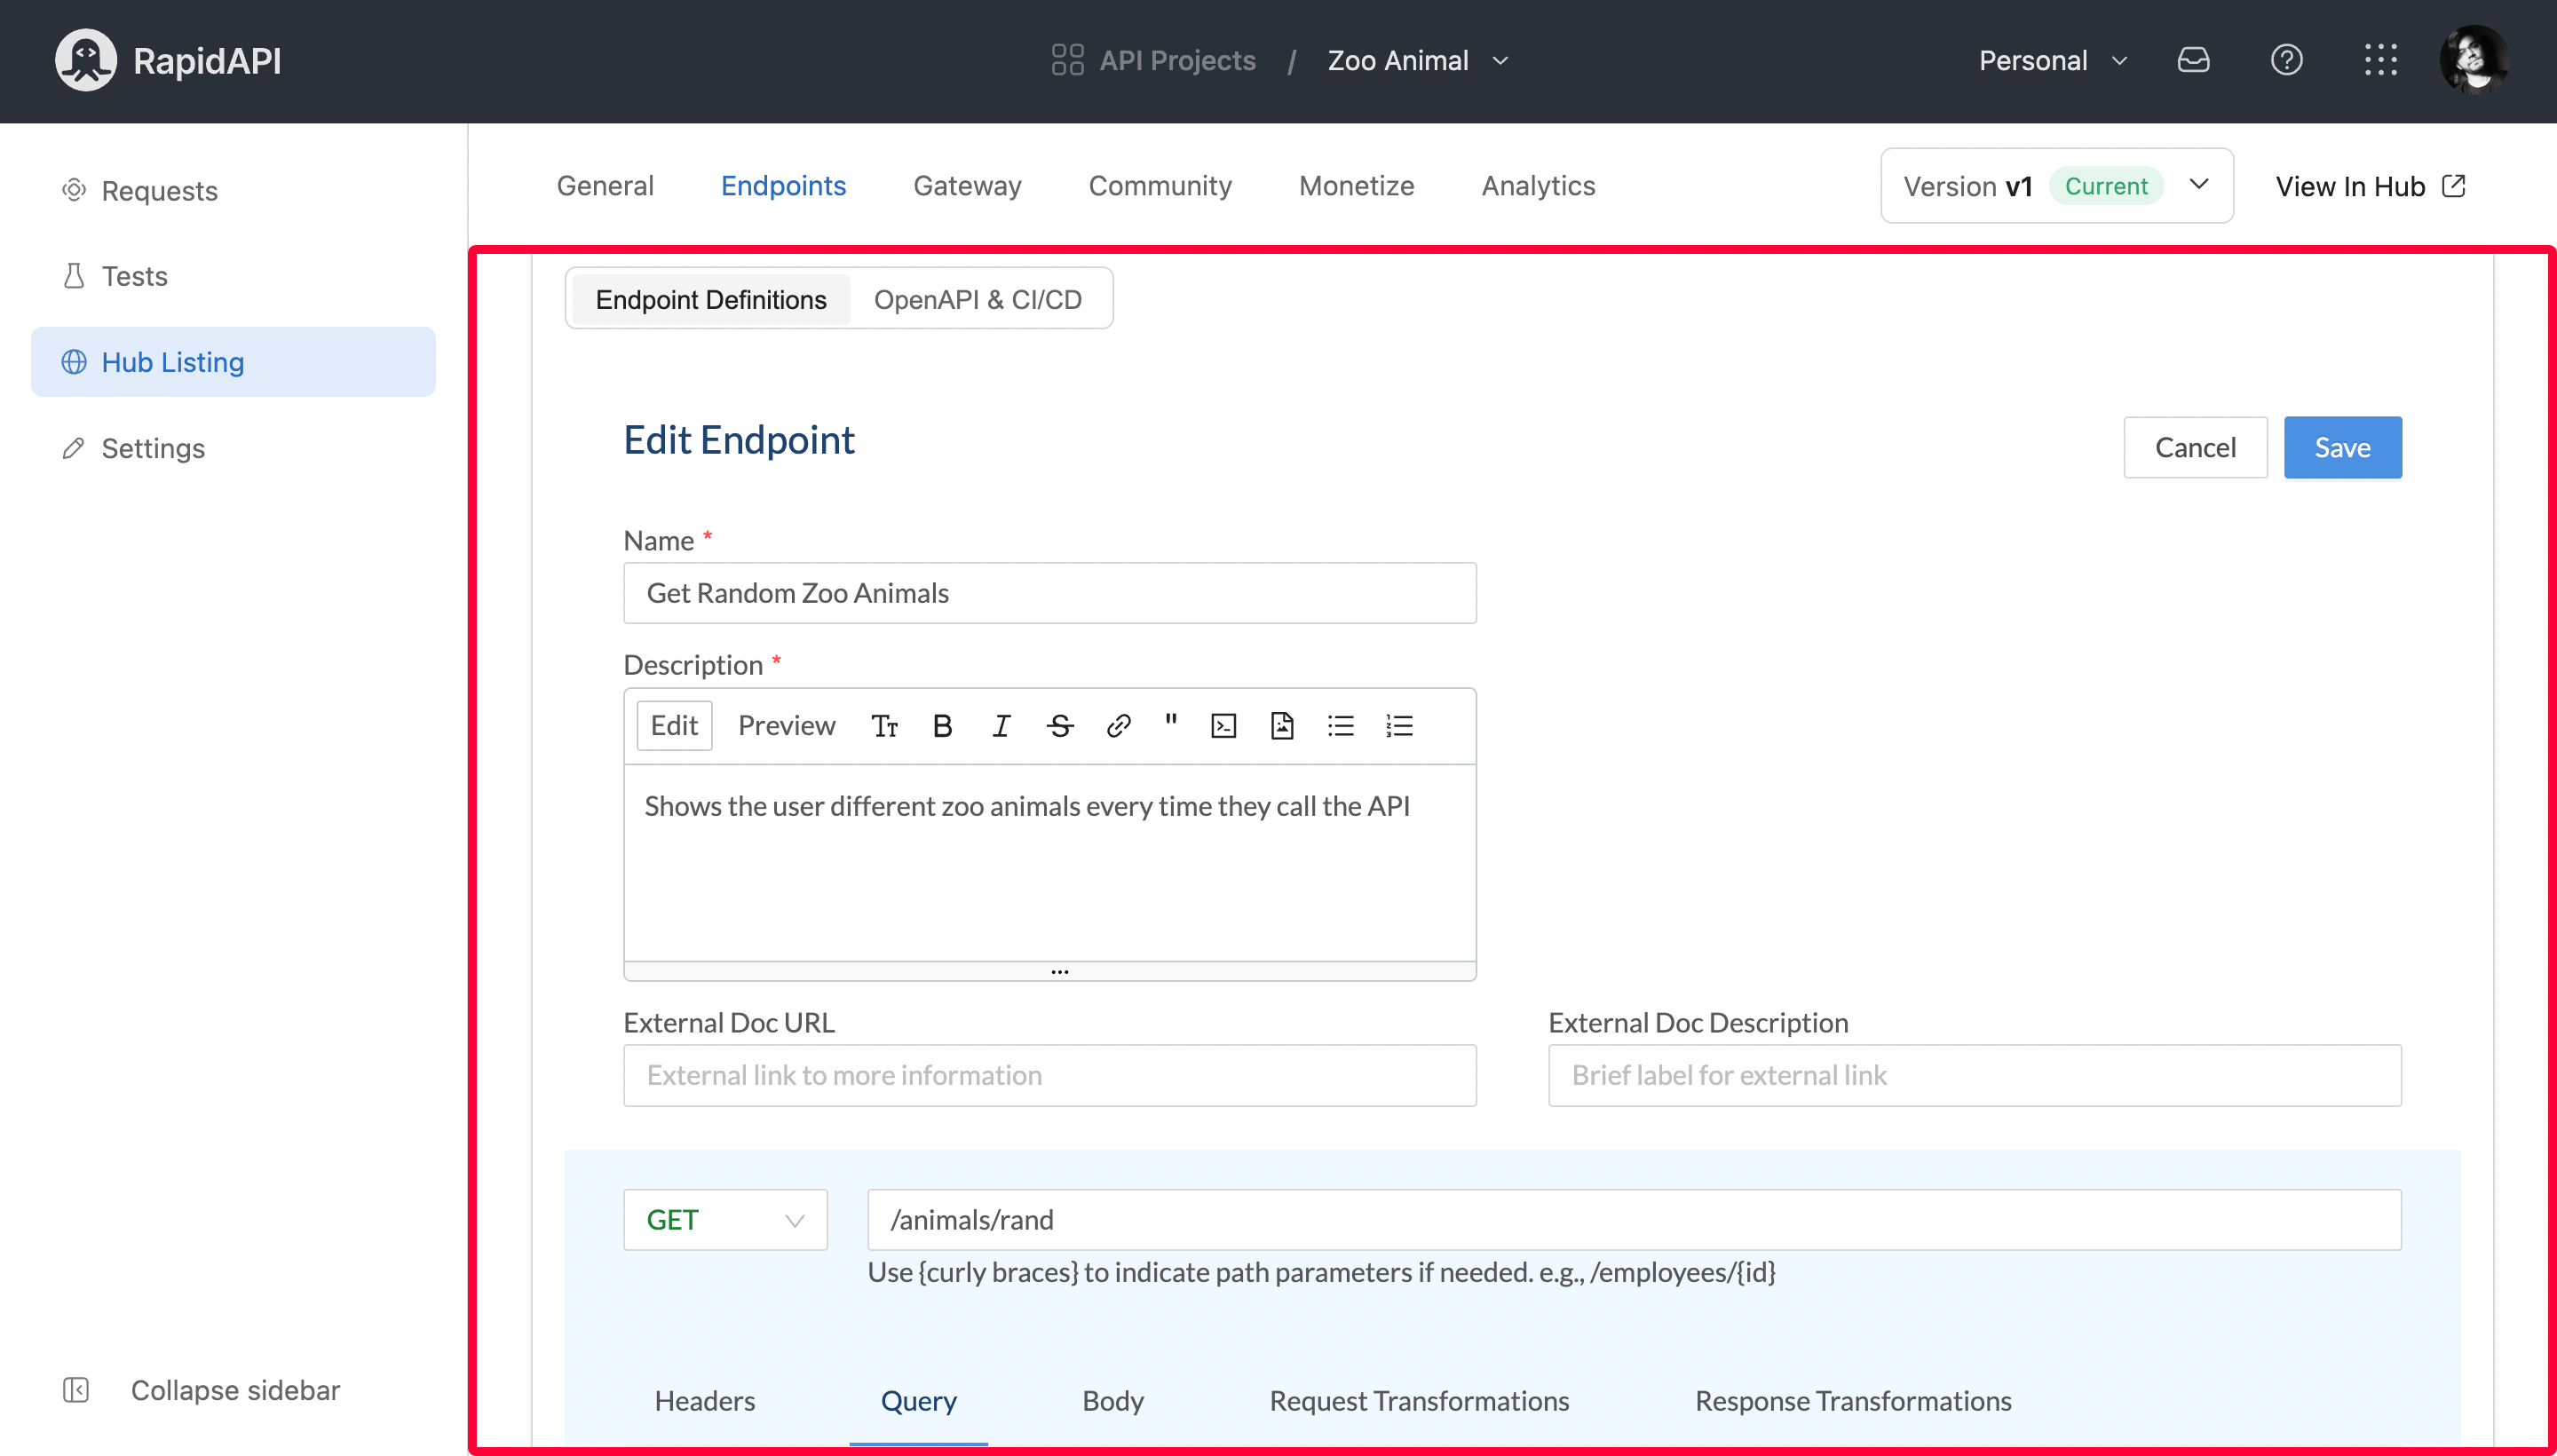
After you are done, click the Save button.
→ STEP #4
The last step is to share the API with other people privately. For this, go to the Community tab and select Invite Users. It will show a field where you can search for a user, organization, and team. Let’s go with the user. I will type the name of the user and click on Send Invite.
Make sure the person you invite has signed up on RapidAPI; otherwise, you will not be able to find them.

And that’s pretty much to it. We have successfully created an API using RapidAPI Studio.
Debug Your API Using RapidAPI Studio
If before or after publishing an API on RapidAPI Hub using RapidAPI Studio, you want to test it to check it is working as expected, you can do it using the built-in HTTP client of RapidAPI Studio.
Let’s look at how we can do it. We will continue our previous example of Zoo Animal API and quickly check its response.
→ STEP #1
Open the RapidAPI Studio dashboard and select the API. Now click on the Requests from the left sidebar. It will open the built-in HTTP Client, where you can test your API.
→ STEP #2
Click on the plus (+) icon under the Requests tab. It will open a new request for us. Here, we will provide the API endpoint, select the HTTP method, and set up the header, query parameters, etc.
Since we have published our API on RapidAPI Hub, we can use the RapidAPI API endpoint. Once everything is done, click on Send.
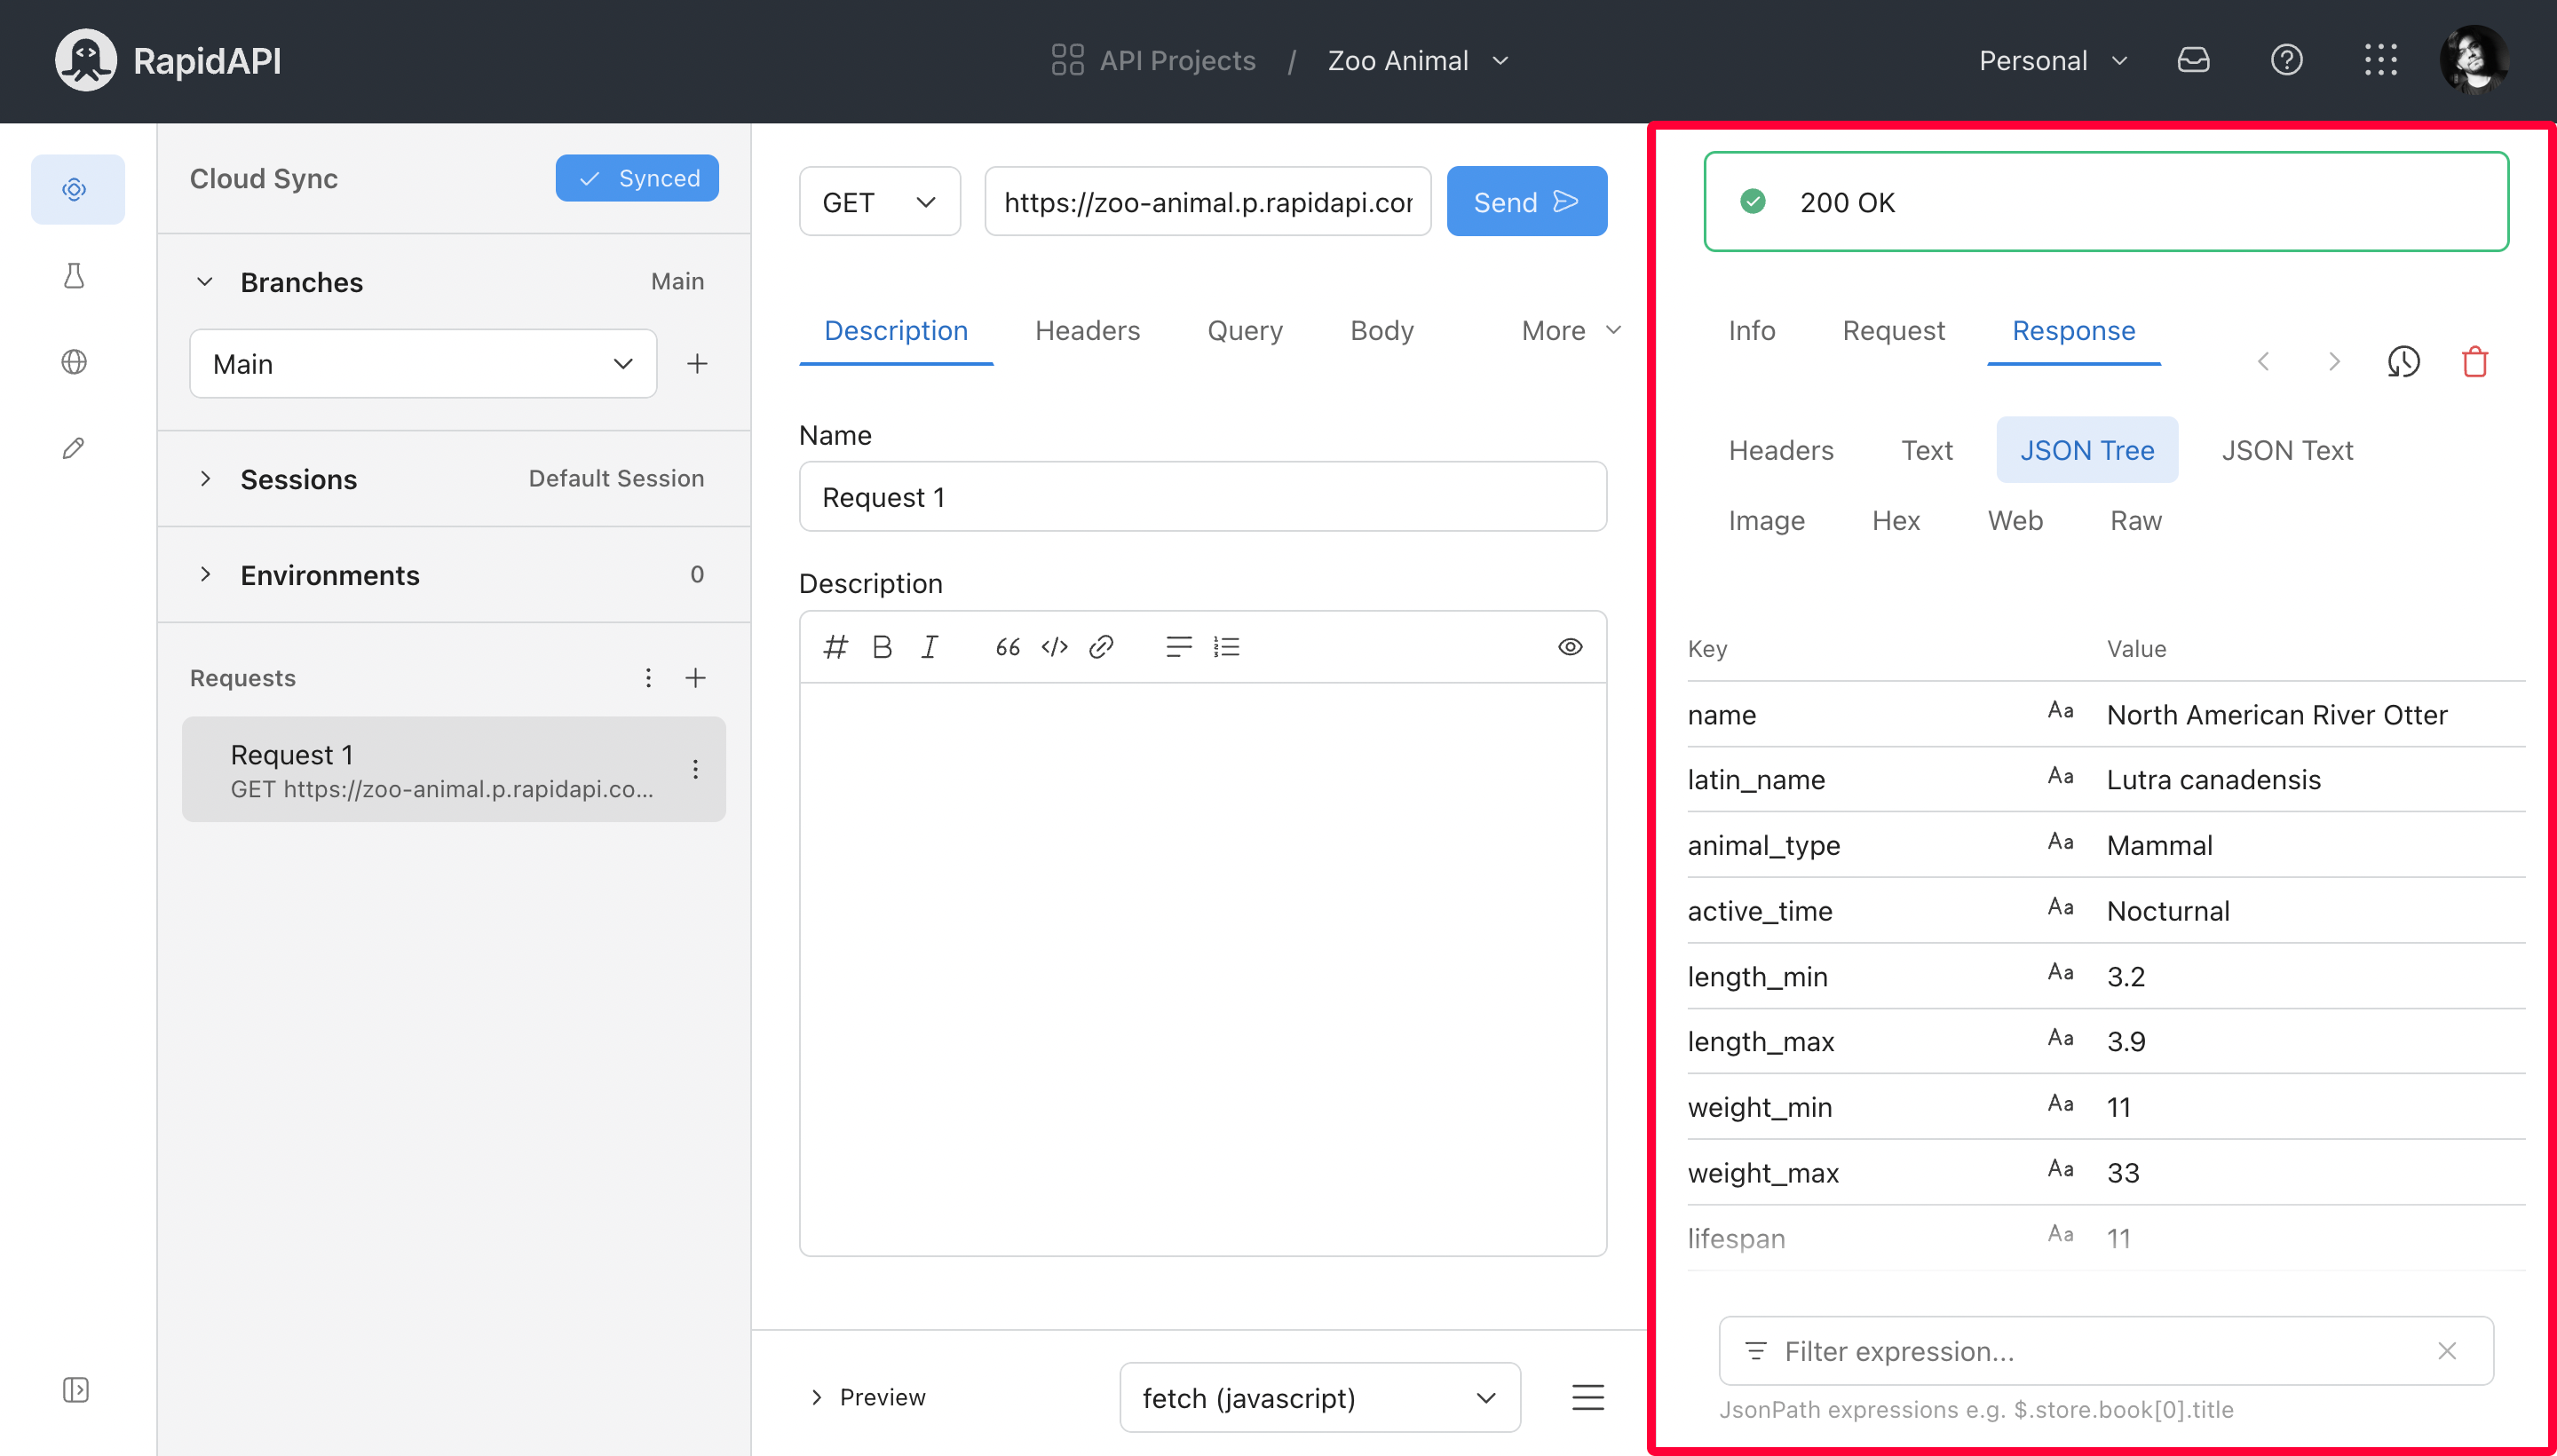
This is a simple example where we made a GET request to an API to check the response it brings. You can dabble around the UI to see everything that is available to you.
Schedule API Tests Using RapidAPI Studio
Let’s continue our Zoo Animal example, and this time schedule an API test for our Zoo Animal API that will run every six hours.
→ STEP #1
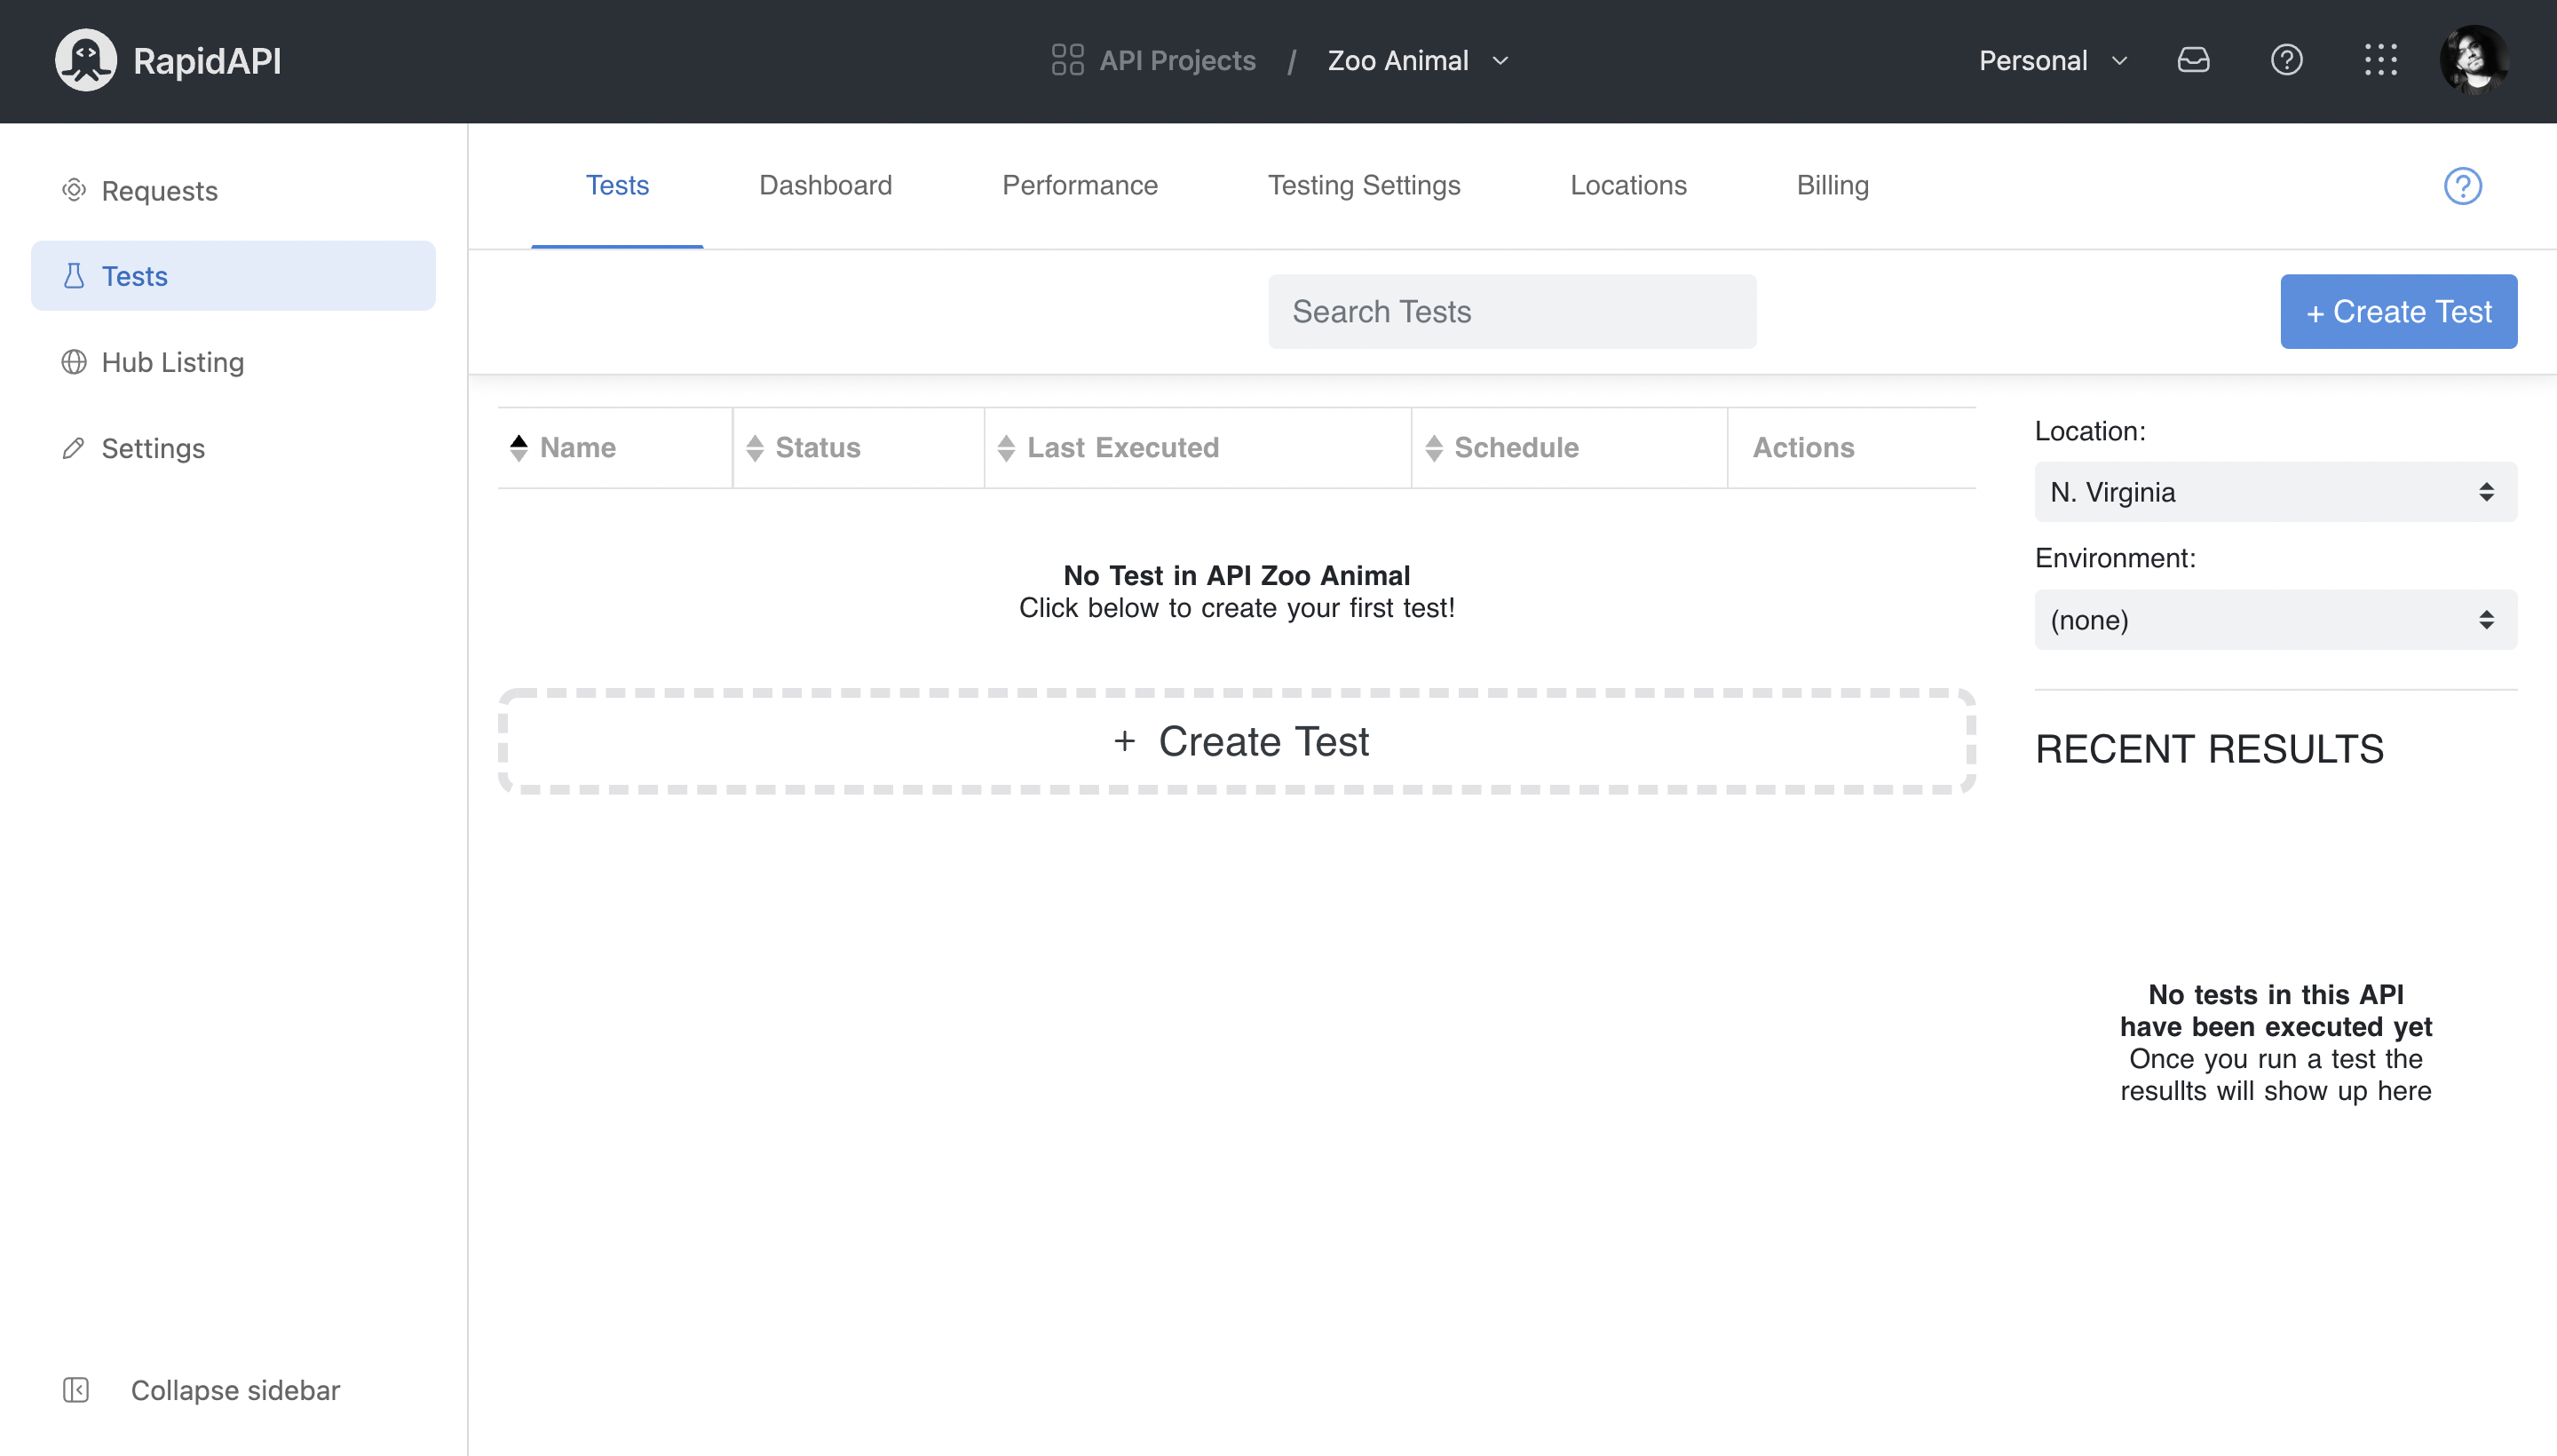
Like before, we will open the RapidAPI Studio dashboard and, inside it, our API. But instead of clicking on Requests, we will select Tests.
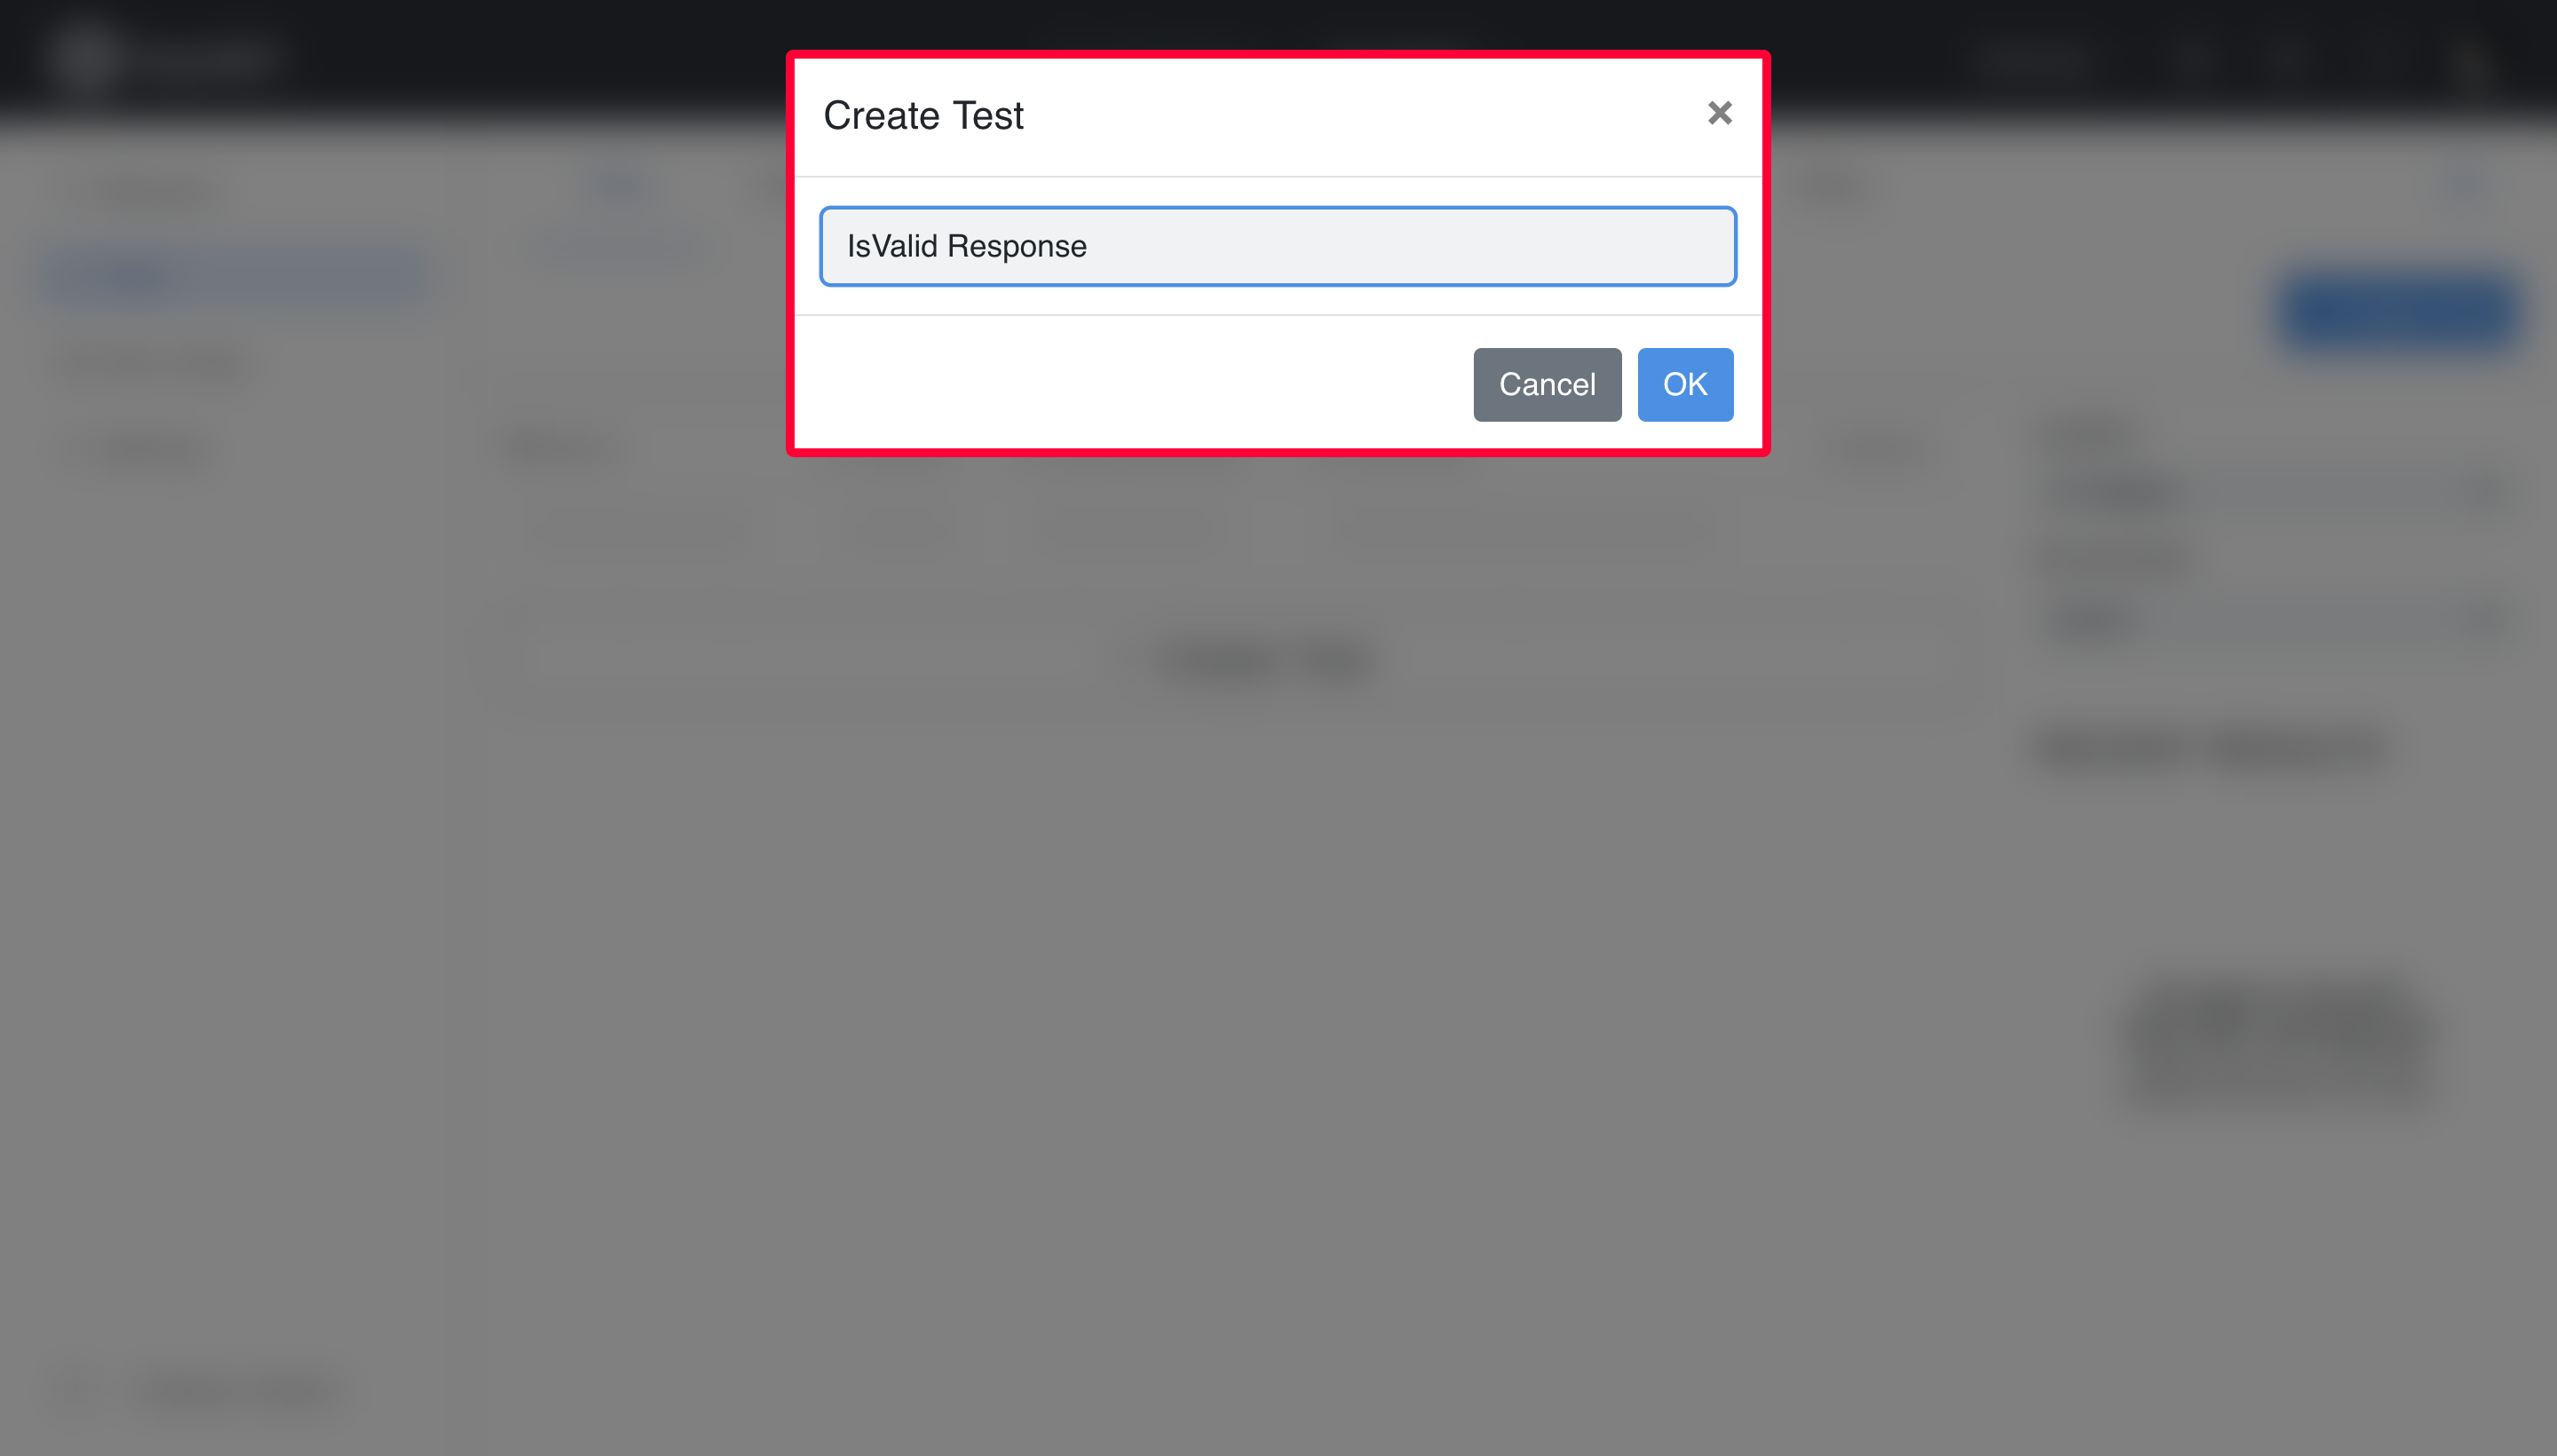
→ STEP #2
Now click on Create Test and give the test a name. Since I am testing whether the API is returning a valid response and not getting an error, I will name the test IsValid Response.
→ STEP #3
We can create an API test in three ways, i.e., using the visual editor, code editor, and automatic test generation. Let’s go with the visual editor for now.
Click on Add Step. It will open a popup box. Select Http Get from the box.
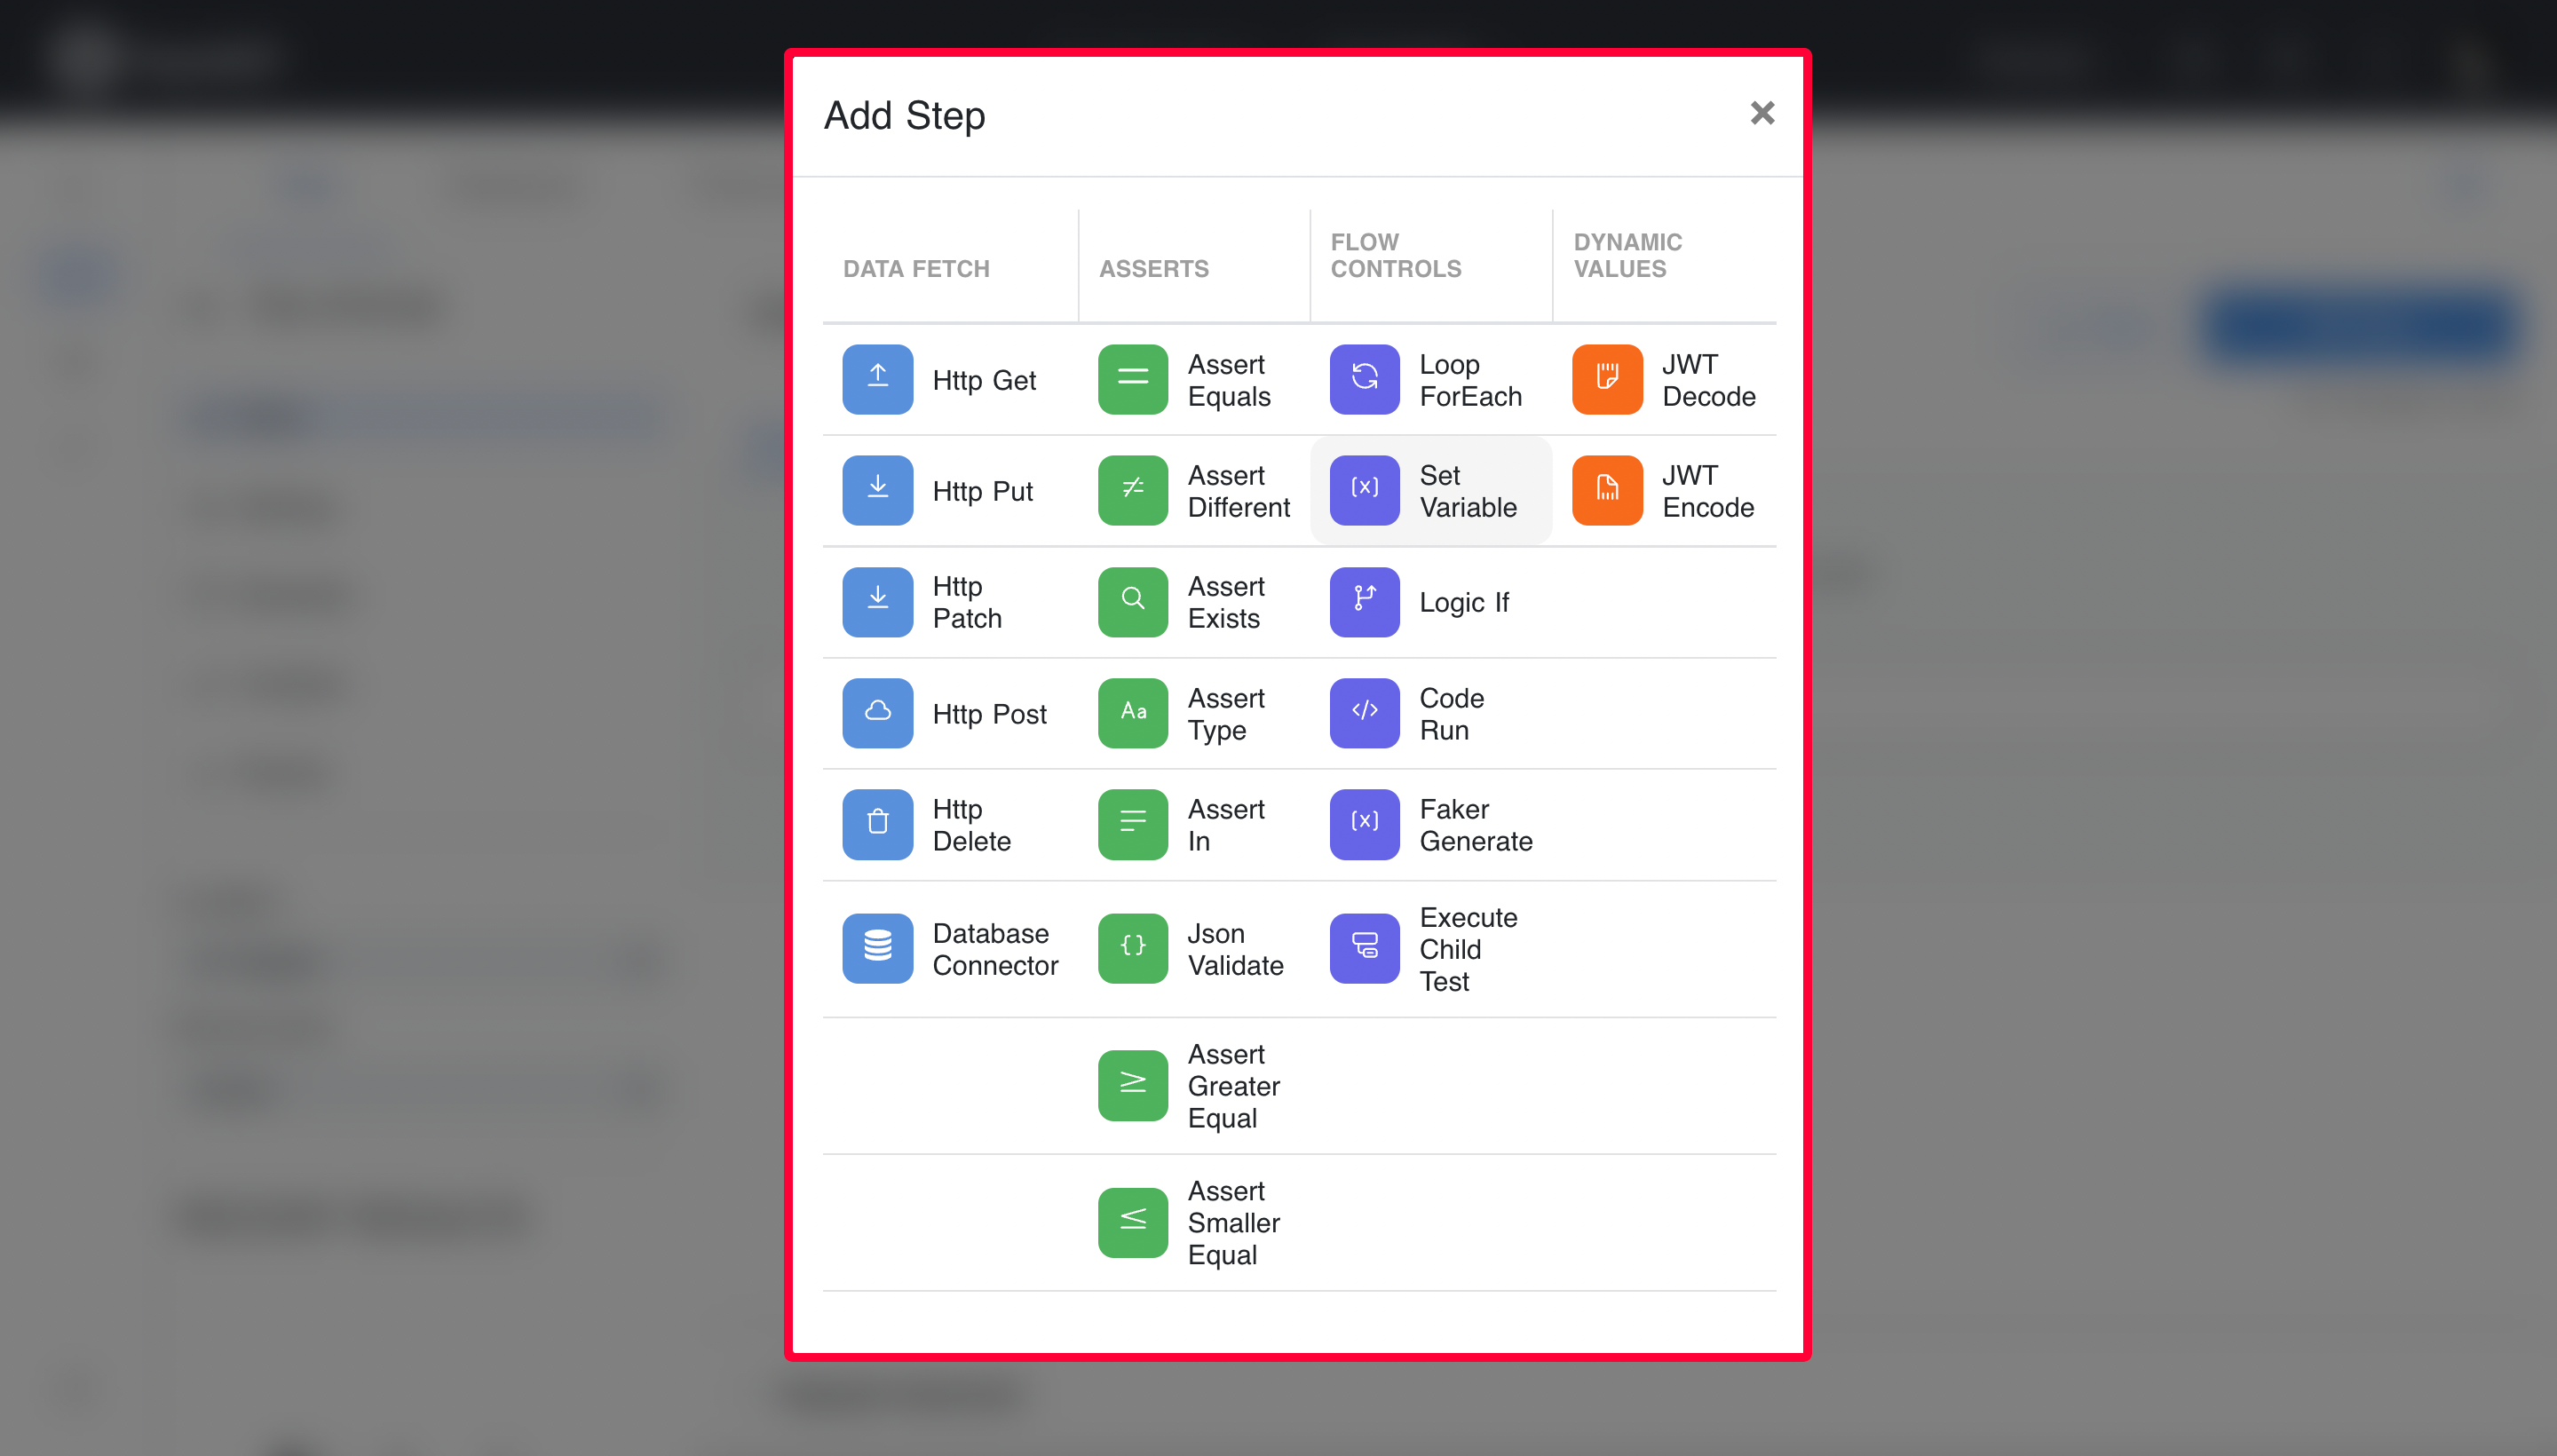
Now fill in the fields like API endpoint, set up headers, request body, etc. Like before, we will use the RapidAPI Hub endpoint for our API because we have published it there.

Now click on Save and Run. It will save the test we created and run it for us.
→ STEP #4
It is time to schedule the test we have created so it runs every six hours. Inside the IsValid Response API test, you will see Schedule appear on the left sidebar. Click on it.

Now click on Add Schedule button. It will ask you for the schedule frequency, environment, and location. I have set the frequency to six hours, the environment to default, and selected Paris for the test location. You can also add multiple locations if you like.
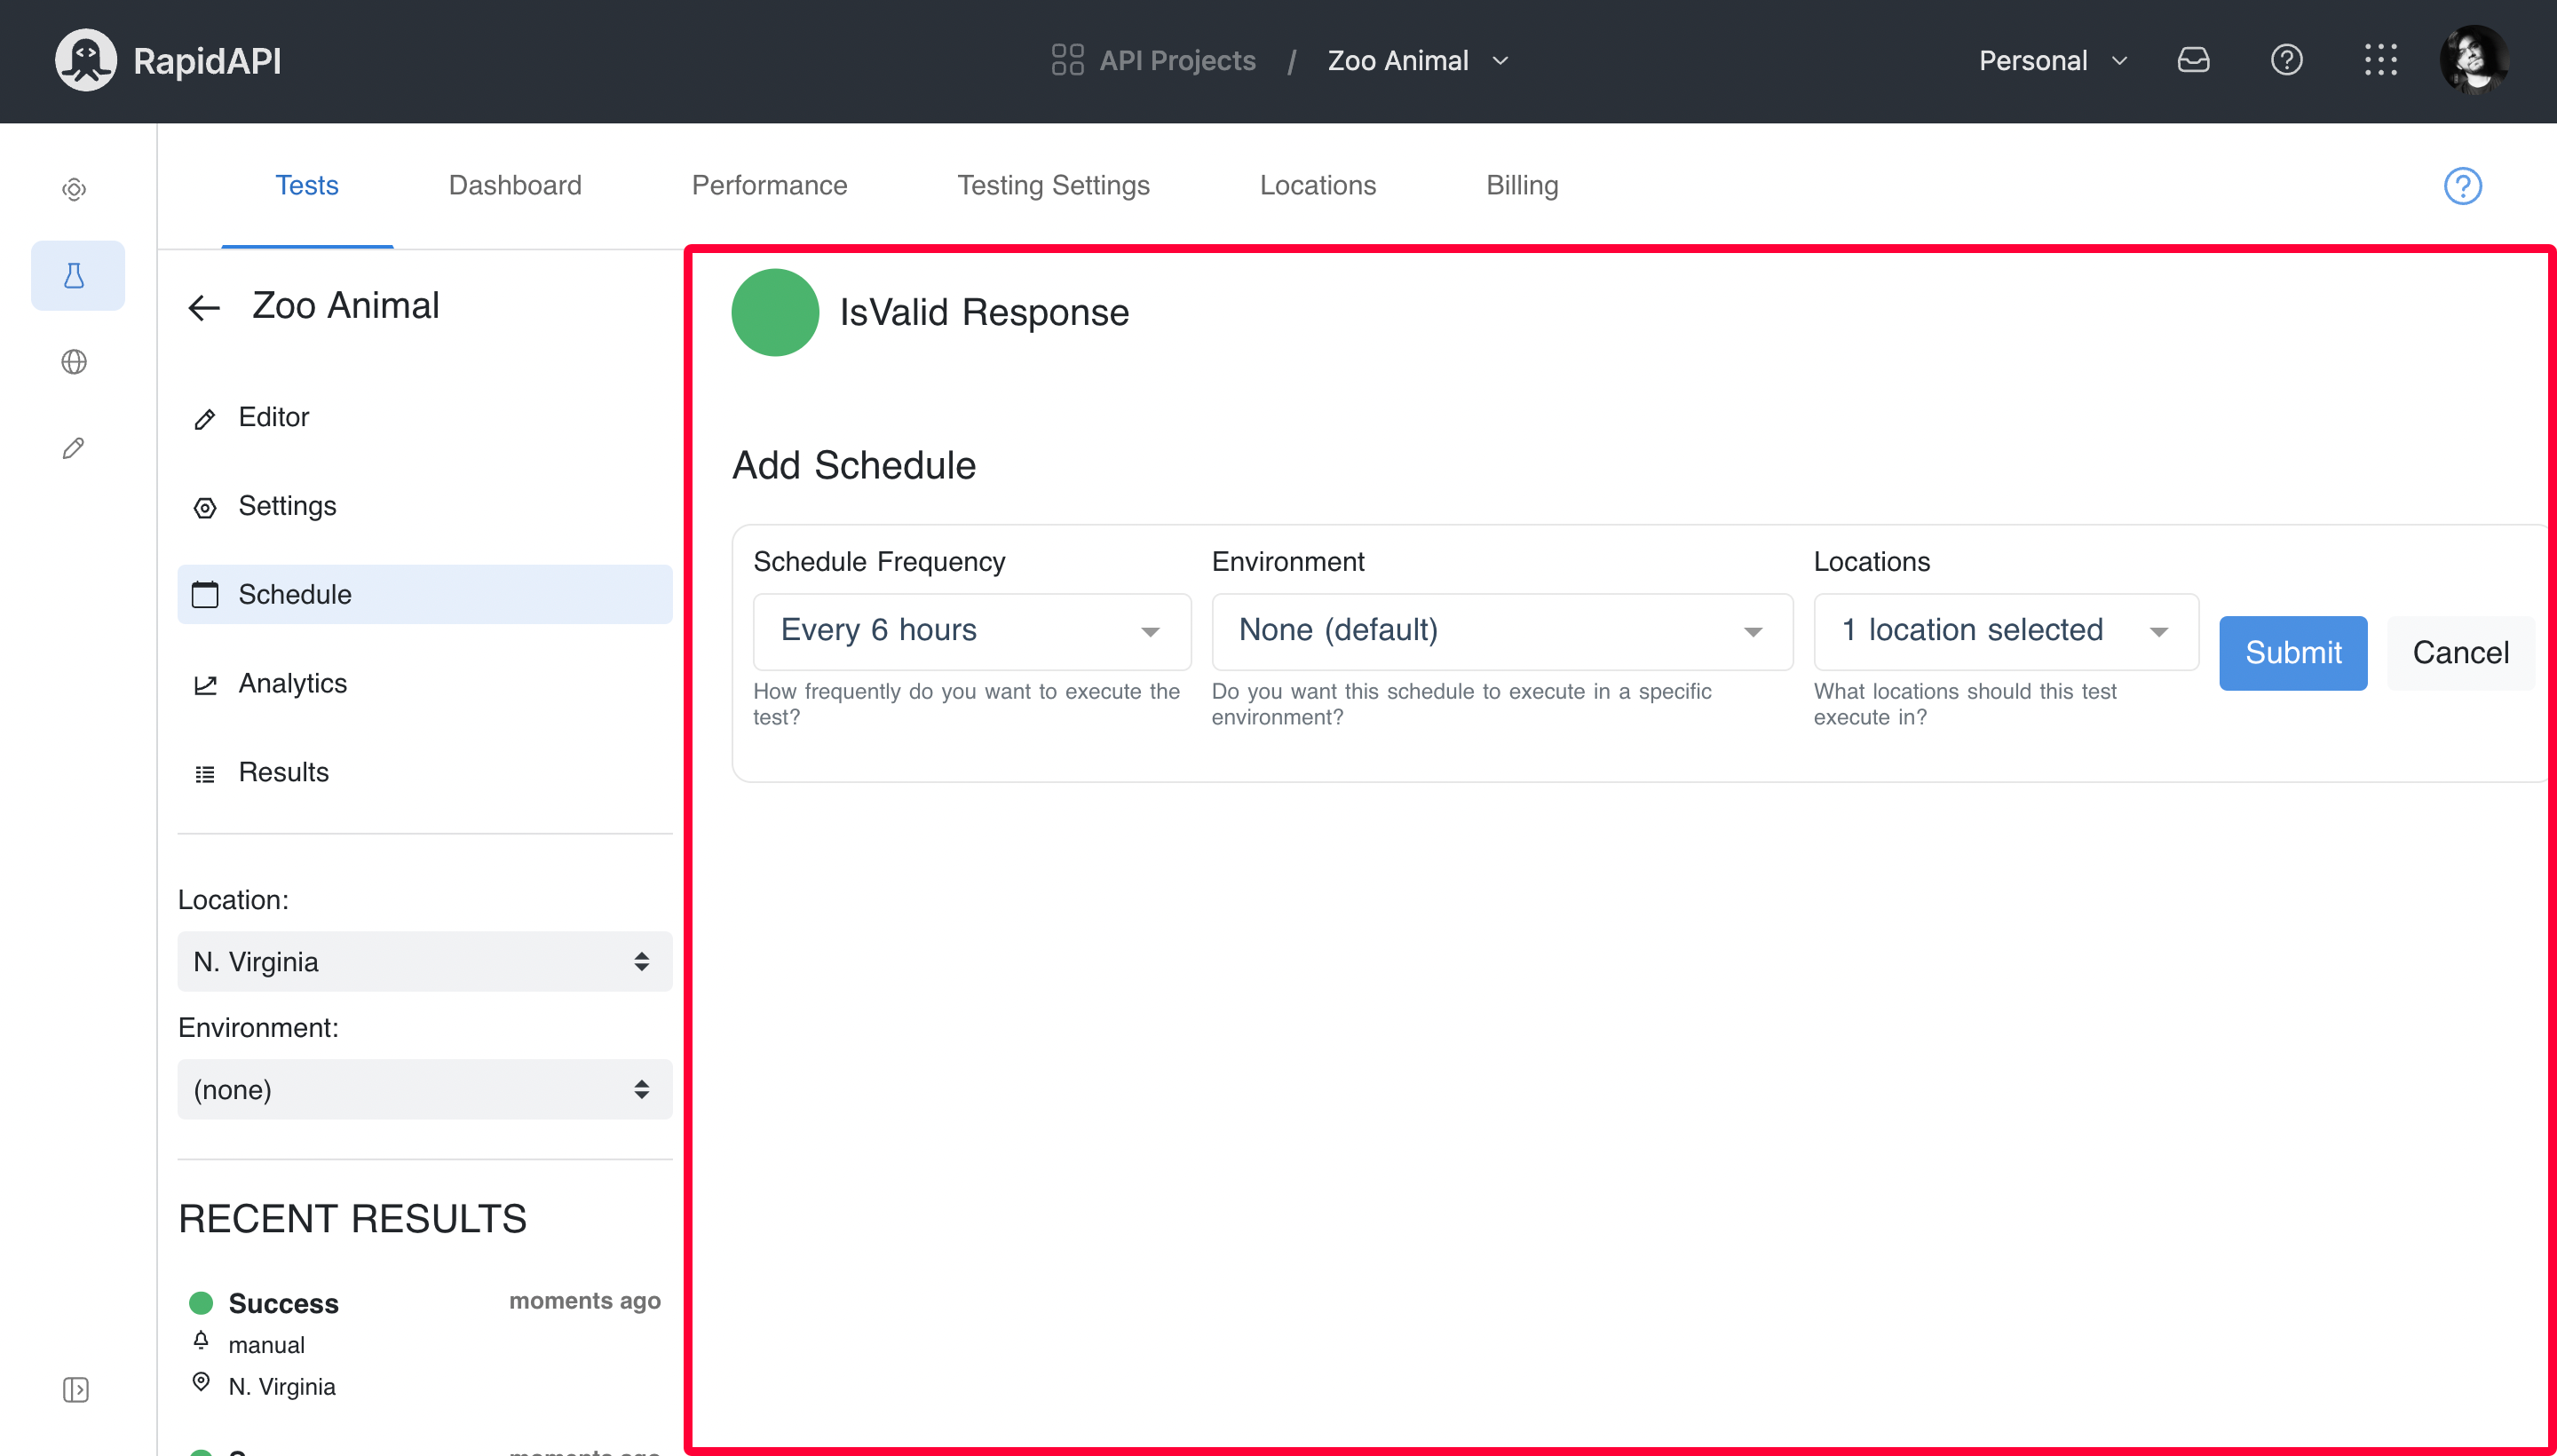
Once everything is done, click on Submit button, and your test will be scheduled.
Wrap Up
RapidAPI Studio is one place for all your API-related needs. You can use it anywhere and anytime in your API development lifecycle. To put things into perspective, we also created an API using RapidAPI Studio, published it on RapidAPI Hub, quickly tested it using the built-in HTTP client, and finally scheduled tests for the API.
If you like this product, I recommend checking out RapidAPI Client for VS Code, which we also just launched. It is full of exciting features and gives you the power to test your APIs inside your favorite code editor.