How to use RapidAPI Client - An API Developer Tool
RapidAPI Client is a cross-platform fully-featured API developer tool. Available for Web, macOS, Windows, and Linux, it offers an API client to debug, test, and interact with HTTP APIs. It Supports any type of API, including REST, SOAP, and GraphQL.
Introduction
RapidAPI and PAW joined hands to introduce RapidAPI Client; which brings the features of PAW, a mac-only tool to multiple platforms of Web, Windows and Linux. After integration with RapidAPI Hub and RapidAPI Testing, it offers a complete end to end API tool for developers.
Getting Started
One of the best things about RapidAPI Client is its intuitive UI. It is super easy to get started with it. Most other API tools require significant time to get used to, but with RapidAPI Client it is pretty simple. Let's demonstrate how we can use it to test an API's endpoints.
→ STEP #1: Log In to Web Client
For this guide, we will be using RapidAPI Client for web. First, click here to navigate to its page and click on the Get Started button. You can use the same user account on Paw and RapidAPI. Create an account if you haven’t already.
→ STEP #2: Create Project
Once you log in, you will end up on your projects page where you can go ahead and create a new project. It will prompt for the project name and initialize a new project for you.
→ STEP #2: Creating a Request
Once you are in your project, you can create a new request by clicking on the + button in the left section. It will look like this:

The left section is for managing requests and environments. The central section is where you can choose the type of request and url of the endpoint, add headers, query parameters, authentication and more for the said request.
→ STEP #3: Specifying our Request
We will be using a mock API for this guide, called JSON Placeholder. You are free to use an API of your own here. I am going to select the GET method for our request and specify the API endpoint to get users like this:

→ STEP #4: Adding Headers and Query Parameters
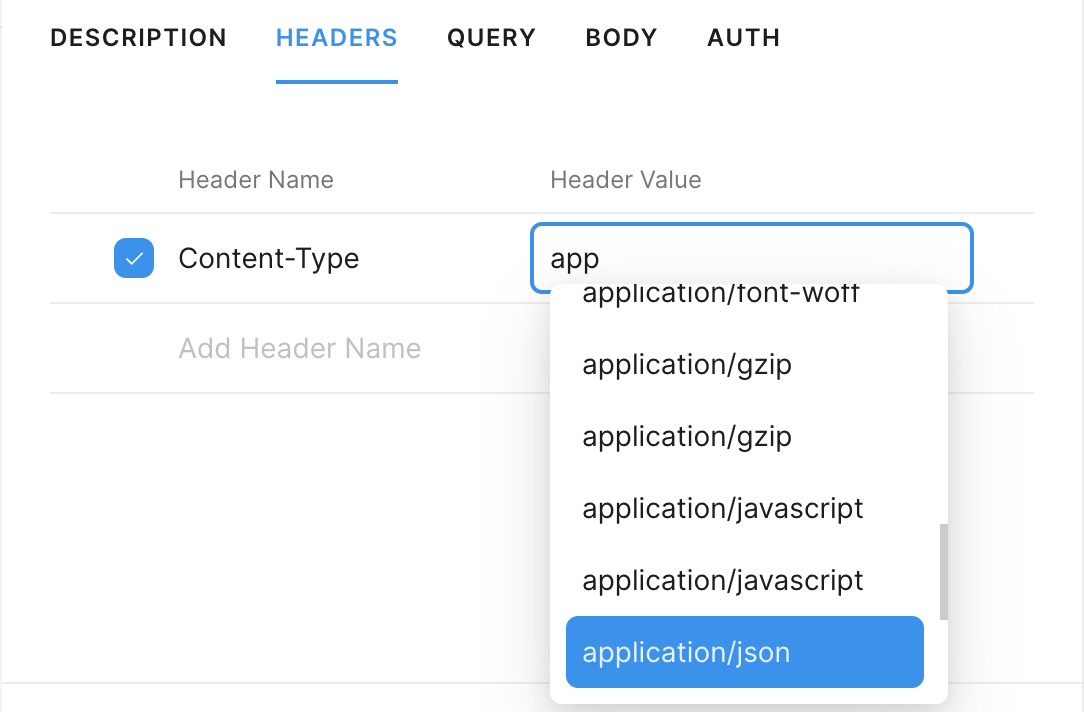
In the Headers tab, I am going to specify the header to be Content-Type of application/json.
Next, we are going to specify paramters for our query. Our endpoint of users can take id as a parameter, so let's add that.
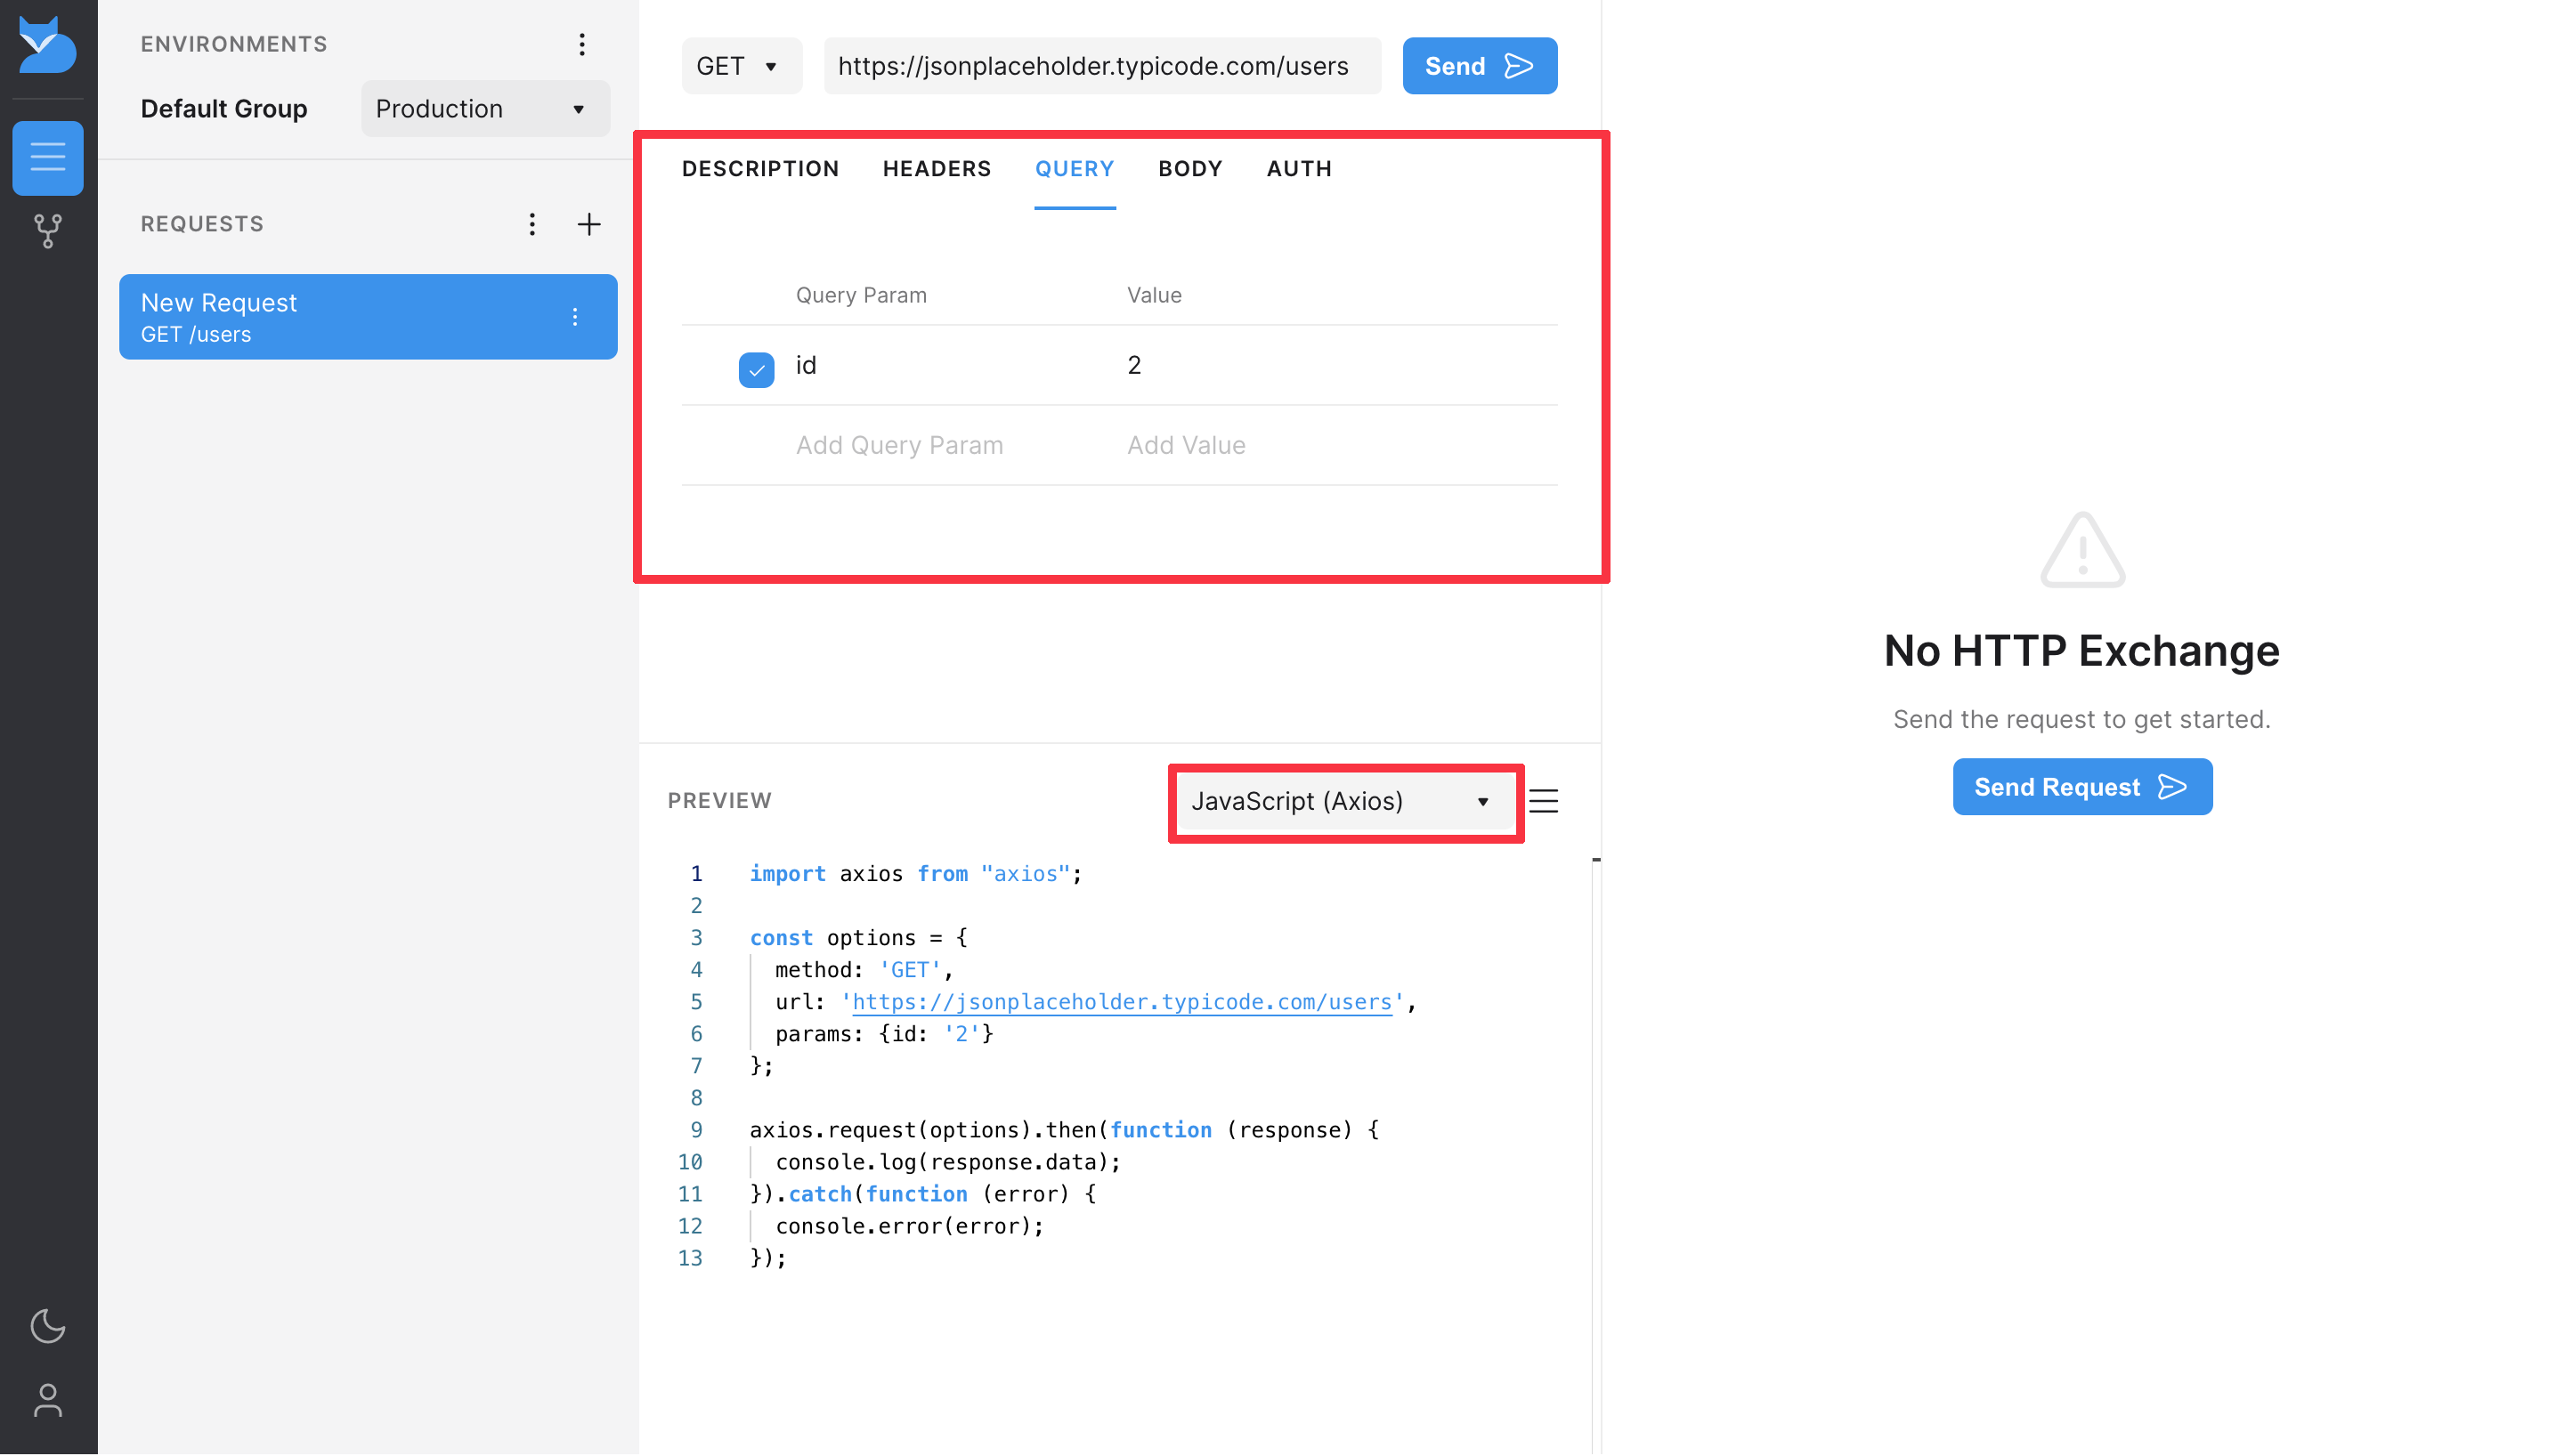
Last but not the least, in the above image you can see that it also offers code snippet generation in multiple languages. Go ahead and click on the send button.
→ STEP #5: Response
We see a status code of 200, which means our request was successful. In the response, you can see that we get the details of the user with id of 2, as specified in our request.
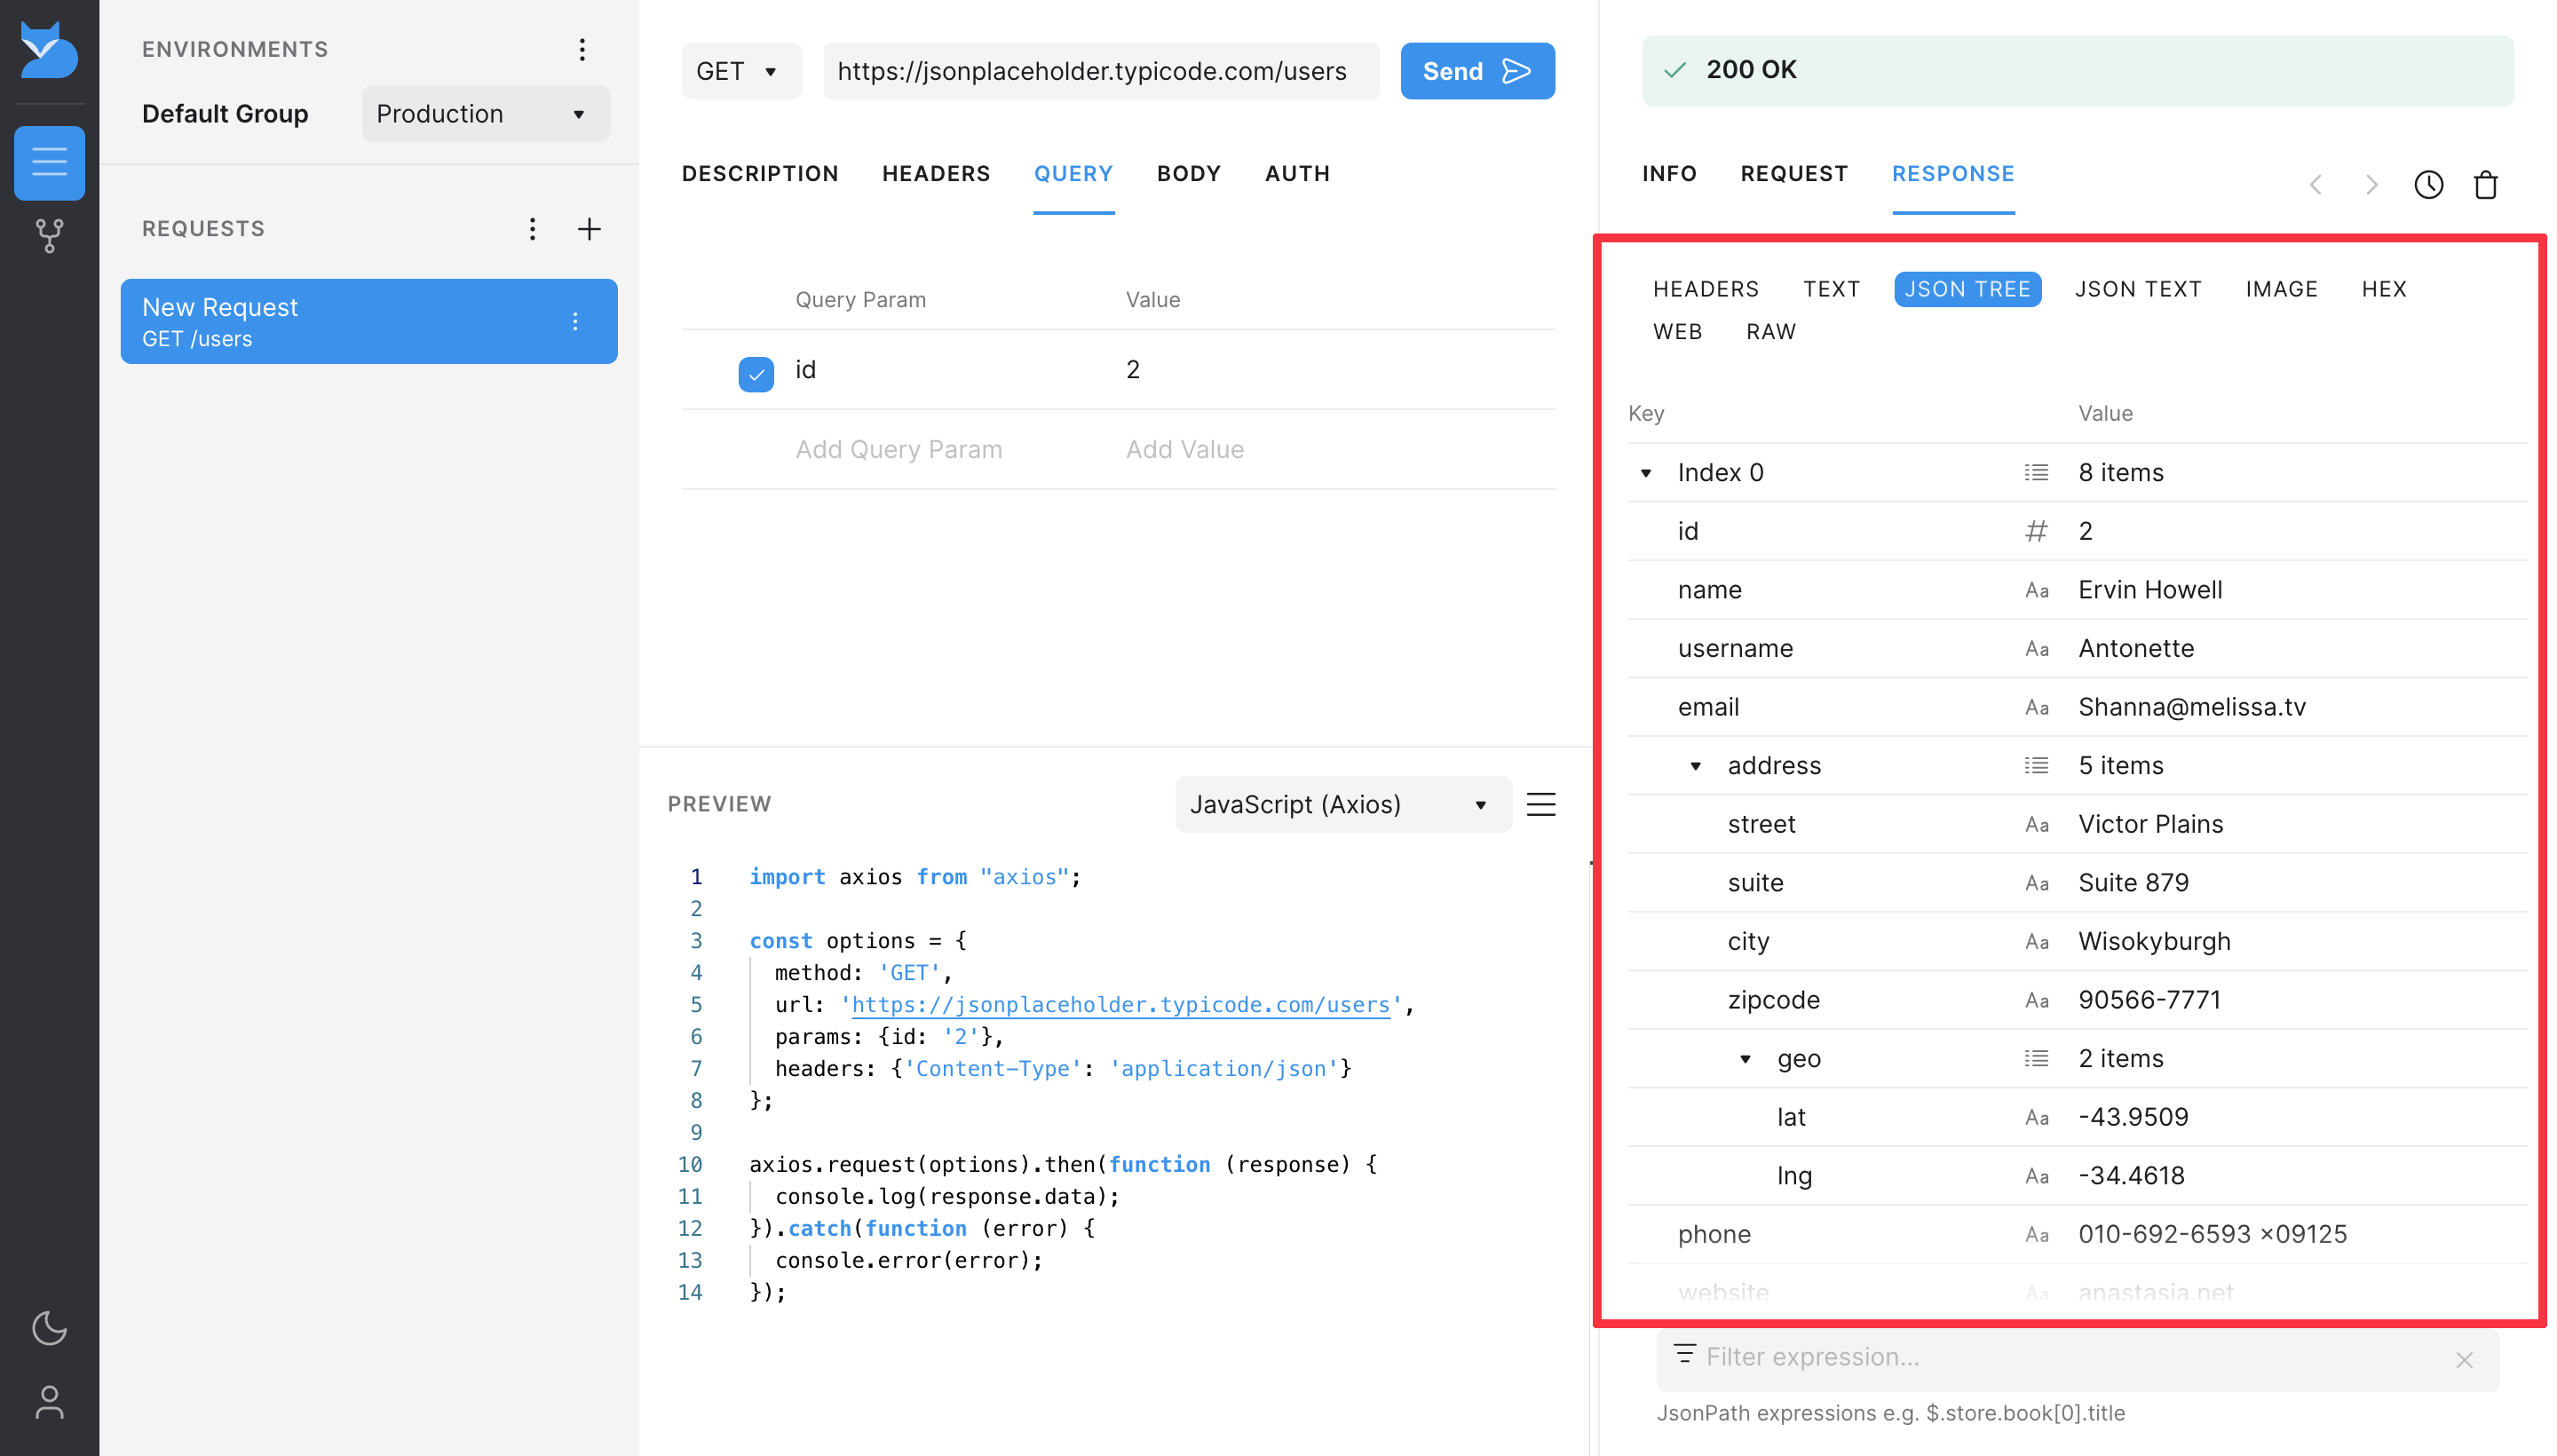
The response is shown in a JSON Tree by default. You can choose multiple formats for the response in the tab here, including JSON TEXT, WEB, RAW and more.
→ FINAL STEP: Analyzing the API call
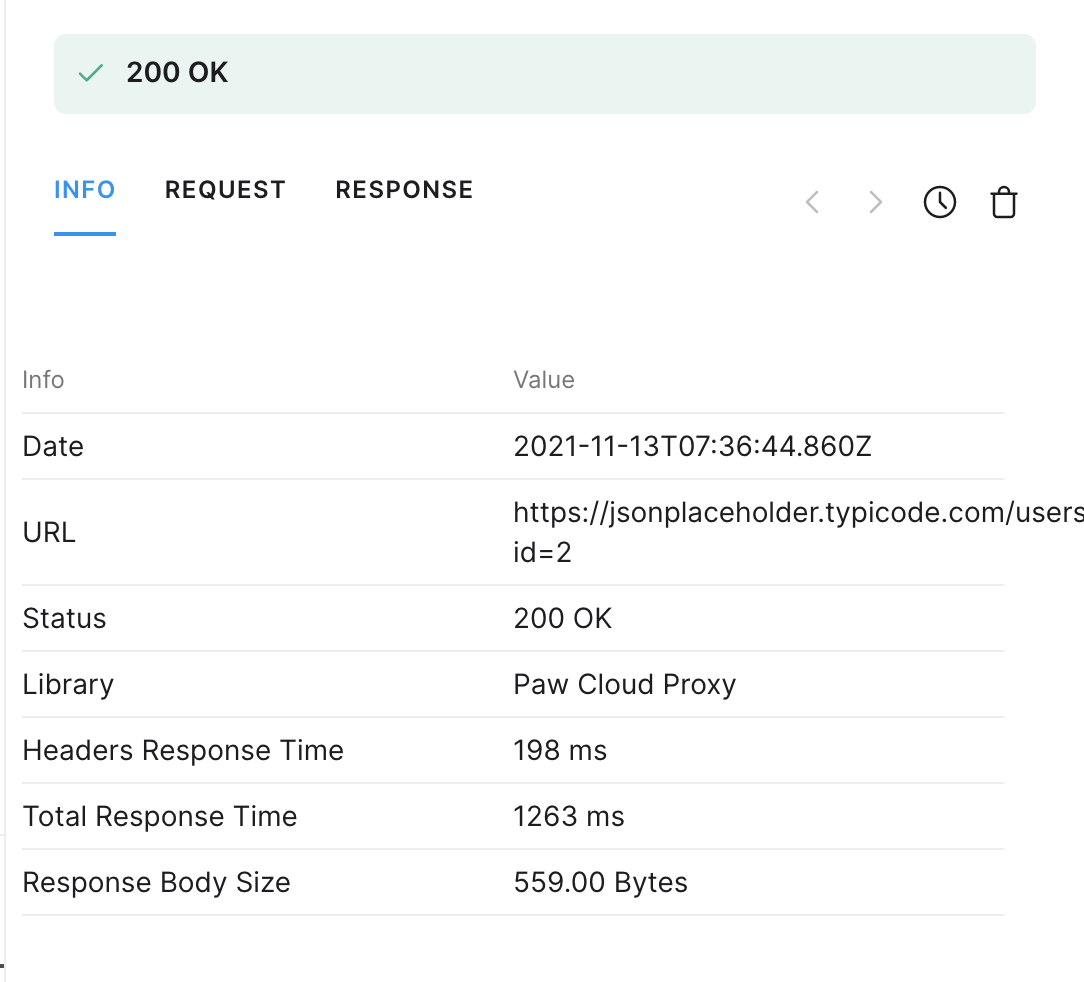
Click on the Info tab in the response section. Here we can see header response times, total response time, size of the response and more. You can test and evaluate your API's performance easily.
That was all about getting started with RapidAPI Client. I am sure that at this point you can tell how intuitive and easy it is to work with. Go ahead and use it for your API development needs.