Say you build the next big API. You have your endpoints up and running and all the functionality is complete. But before developers can start using your API, there are three big tasks to look at:
- Deployment: You need to get your API deployed on servers and publicly accessible by developers around the world.
- Authentication: Unless you want to let anyone in the world make an unlimited amount of API calls, you’ll need to let developers generate API keys that they’ll use to identify themselves when making requests.
- Billing: To make money from your API, you want to configure pricing for it, meter usage and ultimately charge developers.
This tutorial won’t be going into technical depth on the process of coding the API backend, but rather how to get your API deployed with authentication, adding a pricing plan, and getting developers to use your API.
After this article, your API will be officially open for business!

Why RapidAPI
We’ll be using a suite of free business tools from RapidAPI to get up and running as quickly as possible. RapidAPI lets you add user authentication (API keys) and billing plans onto it without any additional development. RapidAPI works as a proxy. Once a call is made, the proxy verifies a developer’s API key, and makes sure that they have a subscription to your API. Only then does the proxy forward the request to your API.

As long as your API knows that the request came from RapidAPI, you can trust that it is authenticated and paid for.
Step 1: Authenticate Request with a Secret Header
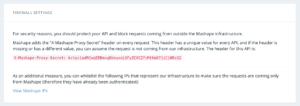
Every API request made using RapidAPI will include a X-Mashape-Proxy-Secret header.* This header has a unique value for every API. If the header is missing or has a different value, assume the request is not coming from the RapidAPI infrastructure.
*Sidenote: RapidAPI and the Mashape API marketplaces have recently merged. You can log into both RapidAPI.com and market.mashape.com with the same credentials. However, some functionality is only currently available one platform or the other. Read the FAQs about the partnership here.
For Heroku, you’ll need to restrict your API using the X-Mashape-Proxy-Secret* header.
To find the X-Mashape-Proxy-Secret, log into market.mashape.com. Next, go to your API’s settings page, select the Network subpage, and find the firewall section.

Every API request that comes from RapidAPI will include this key. To verify that the request is from a RapidAPI user, just add a quick check within the logic of your API to verify the secret header is included.
Step 2: Document Your API on RapidAPI
In order for developers to consume your API through RapidAPI, you’ll need to list it on the marketplace. Listing your API makes it available to 400,000 developers on market.mashape.com and rapidapi.com.
Define API Endpoints
First, you’ll need to log into market.mashape.com to select the option to add an API. When you create a new API on RapidAPI, you have the option to import a Swagger 1.2 file. Swagger is a tool used to describe and document RESTful APIs.
If you don’t have a Swagger file, then you can document your API endpoints manually. Get started by selecting the add endpoint button.

You will see five different fields to define the API.
Method: The method defines the way the endpoint will be accessed. RapidAPI supports GET, POST, PUT, PATCH, DELETE methods.
Route: The route refers to the route of endpoint. Remember what your Base URL looks like (ex. https://api.domain.com/v3). The route builds from the Base URL, so don’t forget to add an initial “/” ( “/status”).
Side note: In some cases, the user may want the functionality to specify a parameter in the route. In this instance, use curly braces to encapsulate the user-defined parameter. For example, if I enter “/status/{appid}” as a Route, an additional parameter input box will be created for the user to specify the parameter’s value
Group: A group is a list of related endpoints. Grouping API endpoints can prove helpful for developers to easily locate related endpoints.
Name: -This is the name displayed in the menu on the right hand side of the Documentation explorer on RapidAPI.
Description: These help users understand what the endpoint does specifically.
Add Query-string Parameters to Your Endpoint
Query-string parameters are used to add additional parameters that can be sent when an API request is made. Adding them to your documentation allows developers to see which parameters are available for them to use when calling the API. Click the blue button to add query-string parameters.

The fields available for query-string parameters are:
Condition: A query string parameter can be optional, constant or required
Name: The name given to the parameter, in “param=text” this value sets “param”
Type: Sets the type of the value for the parameter (ex. number, string, boolean or binary)
Value: Displays the parameter’s default value, unless you enforce the query-parameter’s value by setting the condition to “constant”
Description: Describe in a few words what the query parameter is all about!
Add API Request Headers
Similar to query-string parameters, you can define custom request headers that will be passed to your API endpoint. Select the “Add Deader” button to add request headers to your API.

The fields available for request headers are the same as query-string parameters. However, the API call sends the request headers in a different way than the query-parameters.
Define a Payload (POST, PUT, and PATCH)
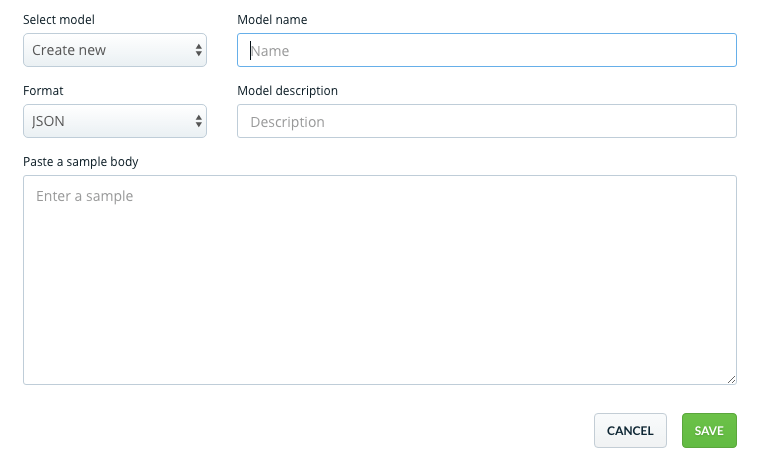
When specifying the method to query the endpoint as a POST, PUT or PATCH method, you should also define a payload. You can add it as a single form value or as a model. We’ll walk through how to do both.

Define a Payload as a Single Form Value
A payload defined as a single form value is the simplest way to pass arguments into the payload. We recommend defining a payload as a form because it allows developers to test the API through RapidAPI more easily than a model payload.
Defining a Payload as a Model
Defining a model payload gives more flexibility, as you can specify a lot of parameters at once (see below):

However, developers will have a tough time changing those parameters during testing. Not being able to change the values will make the testing process much more difficult through RapidAPI. Since developers love to try an API before they subscribe, you’ll want to make your API is as easy as possible to test.
Step 3: Create an API Pricing Plan
Now that your API is on the marketplace, you are officially ready for business! Since RapidAPI handles all billing, fraud detection and invoicing, all you need to do is set up your plans. If you aren’t sure the best practices for monetizing APIs, check out our API pricing guide on Nordic APIs. For a more in-depth look at our payouts system, visit our docs.
Create Tiered Plans
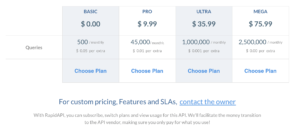
In the meantime, here’s how to add pricing to your API. Within your API on market.mashape.com, navigate to the “Plans” submenu under the Pricing tab. From there, you can define different pricing plans. RapidAPI offers four general tiers: BASIC, PRO, ULTRA, and MEGA. You can think of the audiences for these four tiers as a hobbyist (BASIC), a startup (PRO), a small company (ULTRA) and an enterprise (MEGA). While every API is different, we do have original benchmark data on how people price APIs.
Within this display, you can customize the subscription tiers by adding daily/monthly API request quotas, pricing, and overages fees.
Most API plans are priced by a daily or monthly quota by number of API requests.

In this example, the API is priced by a monthly quota. If a developer goes over the monthly quota, then they will incur the “$ 0.xx per extra” overage fee for each additional API call.
Sidenote: We highly recommend offering a limited free plan as your BASIC tier for developer testing. Plans with a limited free tier see 3x the subscribers as those without. Ensure that developers stay within the quota by charging an overage fee for additional calls.
Add Custom Quotas
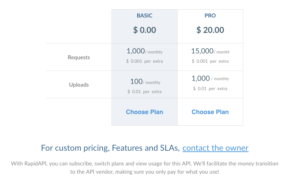
In some cases, APIs require a more complex pricing plan. If your API falls into a more complicated category, consider adding custom quotas to your API. Let’s use a file storage API as an example. If I wanted to differentiate between file uploads (more expensive) than file downloads (less expensive), I could use custom quotas for each endpoint. These quotas could also include different overage prices. You’re able to define which endpoints the custom quotas are associated with. Here’s an example of a more customized pricing plan.

Keep in mind that, the more custom quotas that you have, the more likely a developer may become confused about your API’s usage. This confusion can result in fewer subscriptions or more disputed overage fees. When you add a custom quota, be as explicit as possible as to what the item is, how it will be incremented and what the quota counts.
You can read more about pricing plans with RapidAPI in our docs, or email us at support@rapidapi.com to talk more about API pricing and best practices when adding an API to the marketplace.
Conclusion
That’s it! You now have authentication, pricing, and outreach to 400,000 developers handled. Now you can get back to what you really love working on: the code.

If you’re interested in learning more about joining the marketplace, you can learn more at https://rapidapi.com/api-providers or email us directly at support@rapidapi.com.

Leave a Reply